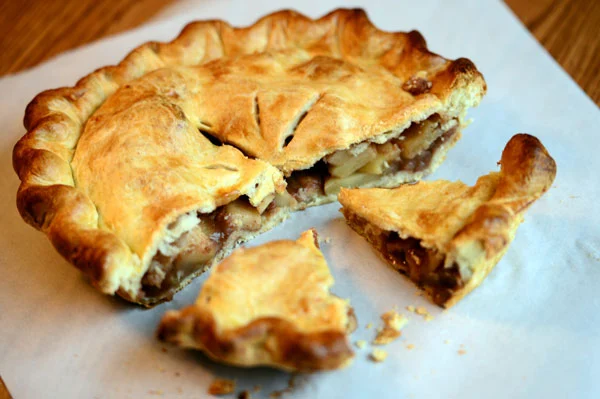
My absolute favorite thing to bake is pie crust. I’ve always had a love for pie, but making pie dough did not come easily for me. I can remember several Thanksgiving and Christmas pie baking attempts that resulted in burnt edges, crusts slumped and shrunk in the pan, a broken food processor, a major burn on my arm, and last-minute runs to buy pre-made pie crust from the grocery store. I never gave up, but after the first few meltdowns my neighbor Chris started stocking extra pre-made pie crusts in her freezer to give to me when mine turned into disaster.
I finally decided it was time to get over my pie crust issues and my mom and I took the Pies A Plenty class at Zingerman’s Bake! in Ann Arbor. This class taught me a lot about the science and technique behind pie dough and gave me the confidence to keep trying to make pie crust.
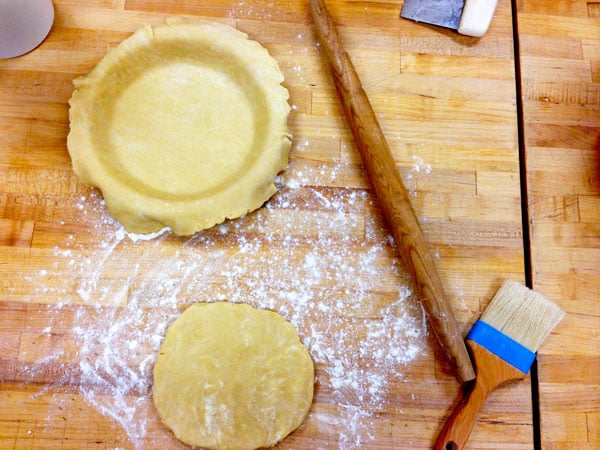
While I learned a lot from the class at Zingerman’s, the key to my success has been practice. Since last summer, I’ve made at least 100 pies and stuck to the same basic all butter pie crust recipe each time. I’ve taken the standard pie dough recipe that was given to me at the Zingerman’s class and made it my own. Using the same techniques and ratio of ingredients has allowed me to become familiar with the dough, learn its characteristics and tendencies, and troubleshoot when things get a little messy. I’ve gone from countless crust disasters to becoming a pie baker who is known for her great crust.
Pie crust can evoke fear in even the most experienced bakers and cooks. I’m here to tell you that it is time to get over that fear. Homemade pie crust is just too good and if you like to bake, it should be in your arsenal. I’ve made it my mission to learn about pie crust over the last year and now I want to share my pie dough knowledge and encourage people to make pie dough at home.
Once you start making pie crust from scratch, you will never go back to the store bought stuff. The homemade version has so much more flavor, better ingredients, and a more tender, flakier texture. I won’t lie and tell you that making pie crust is easy. It takes patience, practice, and confidence. But, once you give it a try, you’ll find it’s a fun challenge and your crust-making abilities improve with every single pie.
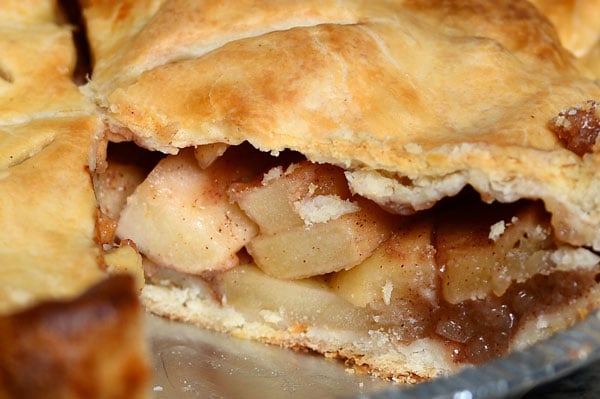
Over the next few weeks, I’m going to be sharing quite a few pie recipes on this site. Next month, I am teaching a pie crust class at Cooks’Wares and I am currently getting prepared by developing a few new recipes and fine-tuning some of my favorites. I will be posting them here as I go.
Today, we will start by talking about mixing the dough. I’ve put together a step-by-step photo tutorial of every step in the dough mixing process and later this week we will go over how to roll out pie dough.
I hope the photos and details help to explain the accompanying recipe and I am always here to answer questions and help troubleshoot via the comments below, Facebook, or email.
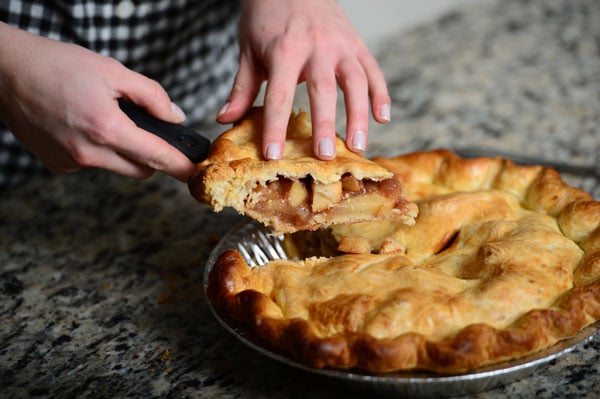
All Butter Pie Crust
Part 1: Mixing the Dough
RULES
1. Be confident and positive. I once heard Joy the Baker say, “Pie dough can sense your fear,” and that is 100% true. Don’t let it scare you.
2. Keep your ingredients cold, cold, cold. The butter and the liquid should be kept in the freezer when you are not actively using them. If your ingredients get too warm at any point, stick them in the freezer for a few minutes to chill them back down.
3. Practice is the key to successful pie making. Don’t expect your first attempt to be foolproof. I still improve my pie baking skills with every single pie I bake. I’m constantly refining my technique and learning new tricks. My crust isn’t always perfect. Sometimes the edges are over-browned or the crust shrinks a little bit and that is okay.
4. Imperfect pie is beautiful pie. The beauty of pie is that it isn’t supposed to be perfect – it’s a homestyle, rustic dessert – and even when there are flaws, it still tastes amazing.
5. Have fun. Baking pie is rewarding, delicious, and a skill worth having.
INGREDIENTS
Let’s start by talking about ingredients. The key to good pie dough is quality ingredients. Pie dough in the simplest form consists of flour, fat, liquid, and salt in a ratio of 3:2:1 – 3 parts flour, 2 parts butter, and 1 part liquid with a pinch of salt added. You’ll notice I do not add any additional sugar to my crust because I just don’t find it necessary. I like the simplicity of using just four ingredients and enjoy the balance of a savory crust with a sweet filling.
All-Purpose Flour – Some recipes call for a blend of flours but I find that all-purpose flour creates the best pie dough. Make sure to buy flour that is unbleached and unbromated. I always use King Arthur’s Unbleached All-Purpose Flour because it is consistent, reliable, and produces a great pie crust.
Unsalted Butter – Butter is where the flavor comes from and the most important component to a good pie crust. Use a high-quality, European-style butter such as Plugra or Kerrygold. It should have at least 82% butterfat. Butter with less moisture is better not only for flavor but because the lower water content prevents the dough from shrinking when it bakes. You can try making pie dough with cheap, lower quality butter (and I have) but your results will be so much better if you buy the good stuff. Every brand of salted butter has a different quantity of salt so it is best to use unsalted and control the salt yourself.
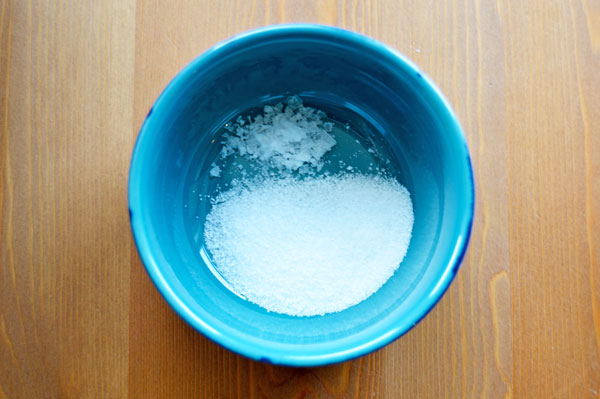
Salt – Salt enhances flavor and makes a better tasting crust. I use a combination of flaky sea salt and kosher salt. For flaky sea salt, I recommend Maldon Sea Salt Flakes and I am kind of fanatical about only using Diamond Crystal Kosher Salt in my kitchen. You can also just use 1 teaspoon of kosher salt instead of the combination.
Buttermilk – I like to use buttermilk because it provides a rich flavor, a hint of acidity, and tenderizes the dough. Always try to buy full-fat buttermilk, although sometimes it can be tough to find. If you do not have any buttermilk, you can simply substitute water.
There are many recipes out there that use different variations of these ingredients and once you get the hang of the basic recipe, you can experiment with using other ingredients such as lard (excellent for savory crusts) or gluten-free flour blends.
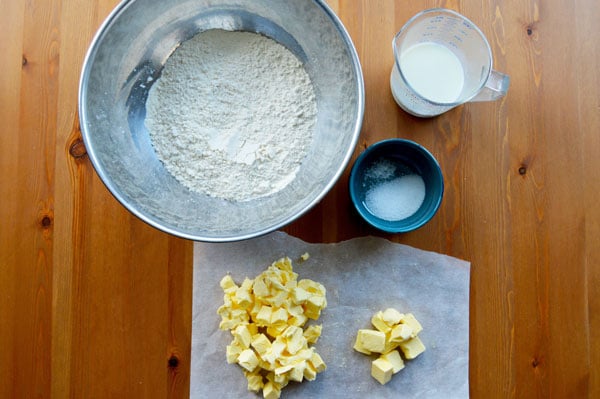
MISE EN PLACE
Mise en place is essential when making pie dough. Before you begin, you need to have everything ready and make sure your workspace is clean and organized. Since the key to pie dough is keeping ingredients cold, it’s important to have everything ready to go before beginning the mixing process.
Gather the necessary equipment. To mix the pie dough, you will need the following:
- A large bowl (around 6 quart capacity), preferably stainless steel. A shallow bowl with lower sides works best because you need to be able to comfortably and easily get your hands inside of it.
- Small measuring cup for the buttermilk
- Small ramekin for the salt
- Fork to mix the dough
- Knife to cut the butter
- Parchment paper for the butter
- Bench scraper
- Plastic wrap to wrap up the dough
Once you gather the ingredients, do the following:
- Measure the flour into the large bowl
- Measure the salt into the small ramekin
- Measure the buttermilk into the measuring cup and place it in the freezer
- Dice the butter, place it on the parchment paper and put it in the freezer
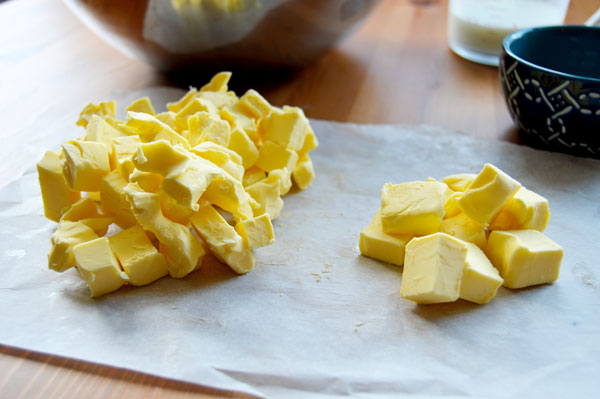
I divide the butter into two portions and dice one quarter of it smaller than the rest. Once it’s time to mix the dough, the larger portion is worked into the flour more than the smaller portion. This helps keep chunks of butter which results in a flaky, tender crust.
To dice the butter – Divide it into two portions, a three-fourths portion and a one-fourth portion. Take the larger portion and dice it up into small cubes, no larger than 1/4-inch each. The smaller you dice it, the less work it is to rub it into the flour. Take the remaining quarter of butter and dice it into a bit larger cubes, about 1/2-inch in size. Place the butter on a piece of parchment paper and put it in the freezer until it’s time to use it.
I’ve started using a combination of salts. However, you can simply use just 1 teaspoon of kosher salt and omit the flaky sea salt.
MIXING THE DOUGH
A clean workspace is key to good baking. Make sure you have ample space and remove any clutter that could get in the way. It’s easy to make mistakes (or spill) when you have a cluttered work area.
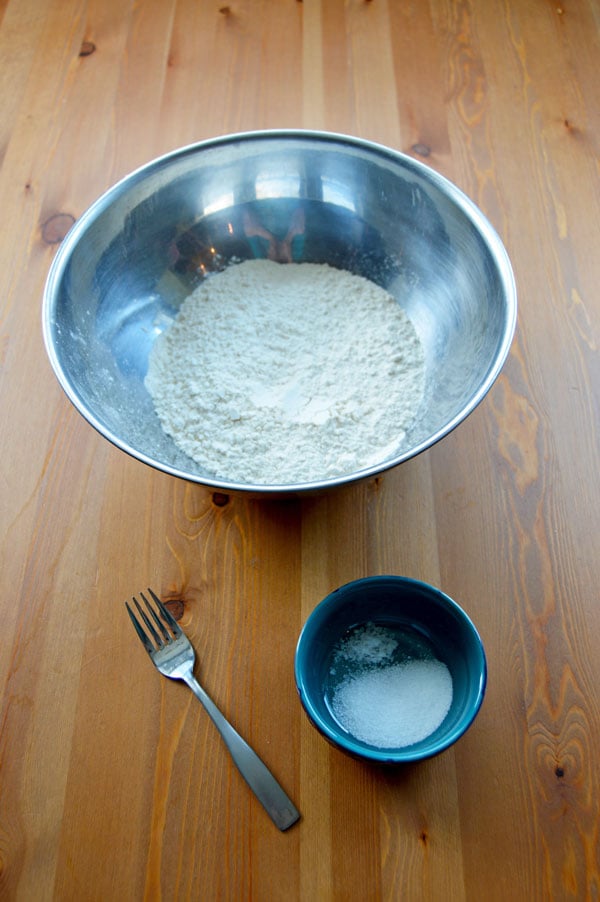
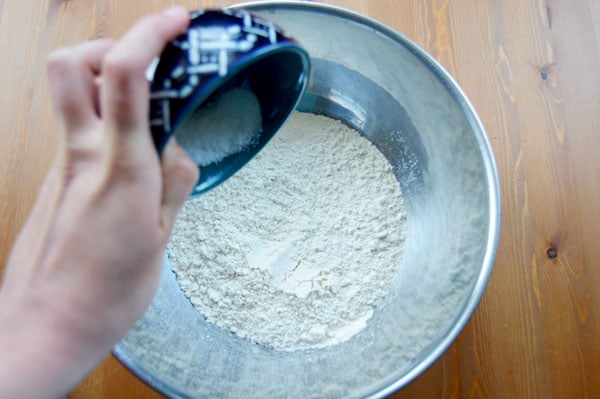
Start by adding the salt to the flour.
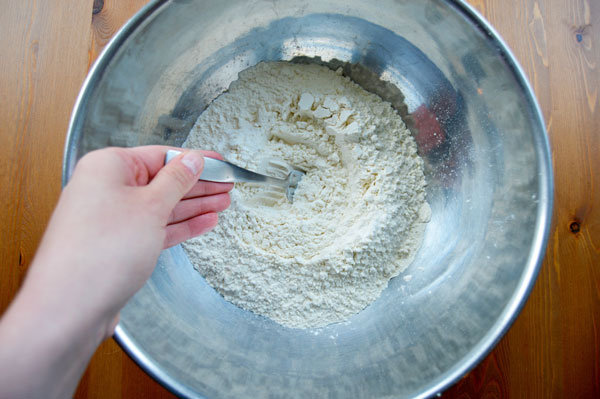
Use a fork to whisk the salt into the flour and distribute it.
Now, take the larger portion of butter (the smaller 1/4-inch pieces) and add it to the bowl.
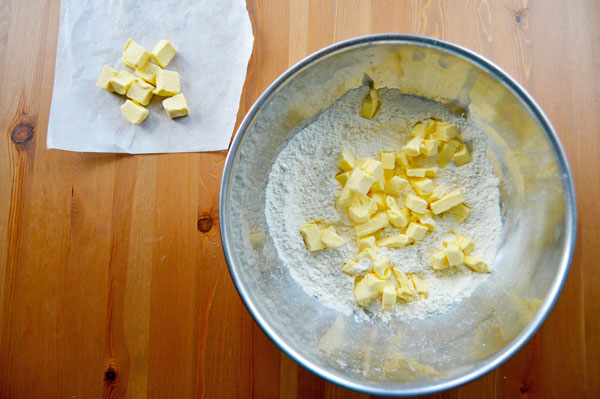
Give it a quick toss to coat the butter in flour.
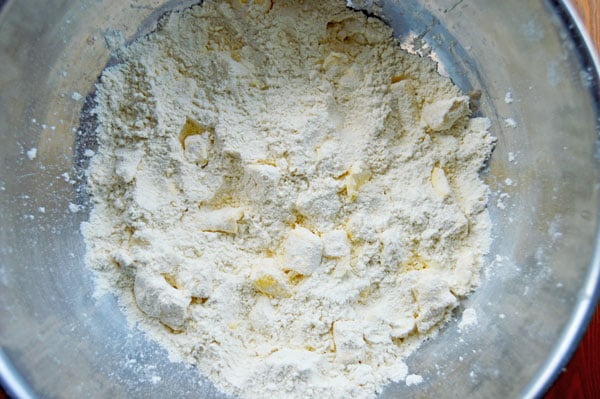
Now, use your hands to start rubbing the butter into the flour. I put my hands into the bowl, grab some of the mixture between my thumb and fingers and rub it to break the butter down into smaller pieces and coat it with flour.
Some people prefer to do this step with a pastry blender. That is fine but I have found that you have more control when you use your hands. The work goes faster and it’s important to learn how it should feel when it is mixed correctly. The more you do it, the more you will find the process relaxing and almost therapeutic.
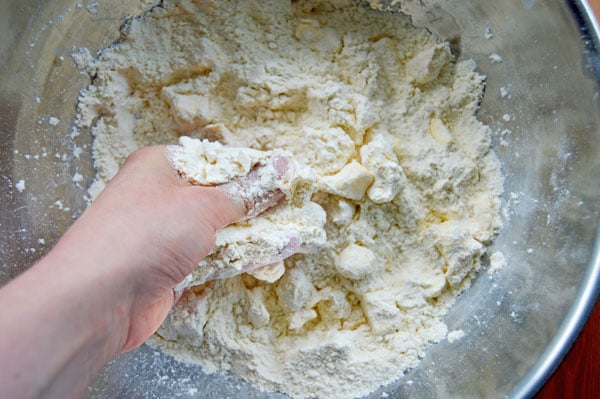
Continue rubbing until the mixture looks like a coarse meal. You want to work rather quickly or the butter will become too soft and it will smear into the flour. If you start to notice this, simply place the bowl into the freezer for a few moments and let it chill.
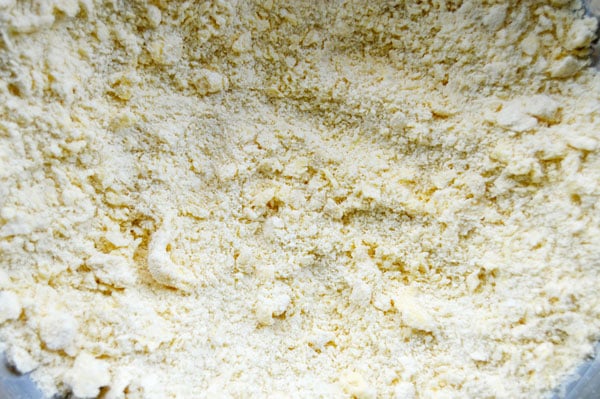
Once the mixture looks like coarse meal, add the remaining quarter of butter and work it into the flour until it is the size of small peas. You don’t want to work this portion of butter quite as much as the previous addition.
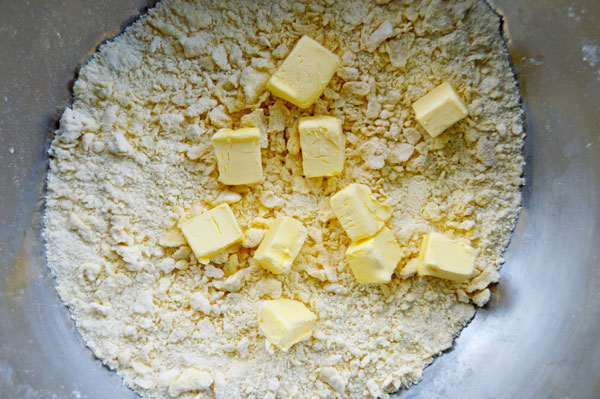
Once you’ve worked in all the butter, the mixture should resemble a coarse meal with some pieces about the size of small peas scattered throughout. You will be able to see some visible pieces of butter and that is a good thing.
If this process took awhile, put your bowl in the freezer for a few minutes before moving to the next step.
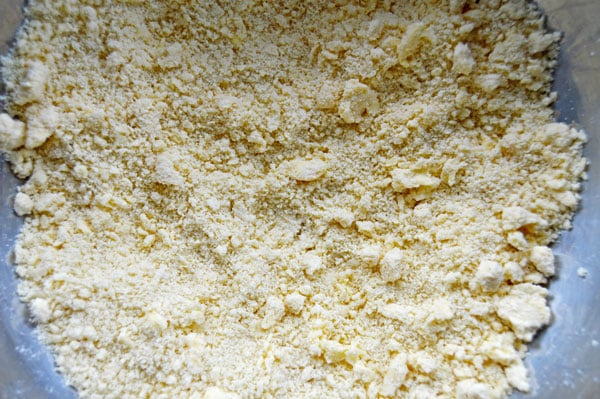
Create a small well in the center of your bowl and pour in half of the buttermilk.
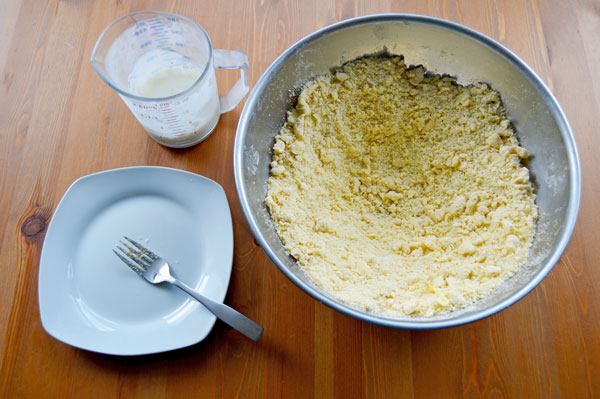
The reason we create a well is to see if the butter was worked into the flour well enough.
If the buttermilk creates a small pool in the well, you did a good job and can continue the mixing process.
If the buttermilk absorbs into the flour immediately, the butter was not worked in well enough. If this happens, it’s best to start over because there really is no way to fix it.
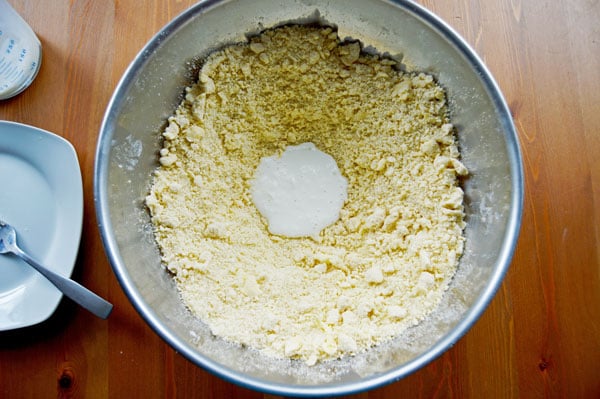
Use a fork and gently whisk the buttermilk into the flour. Once the first addition is incorporated, add another 1 or 2 tablespoons and whisk it in with the fork.
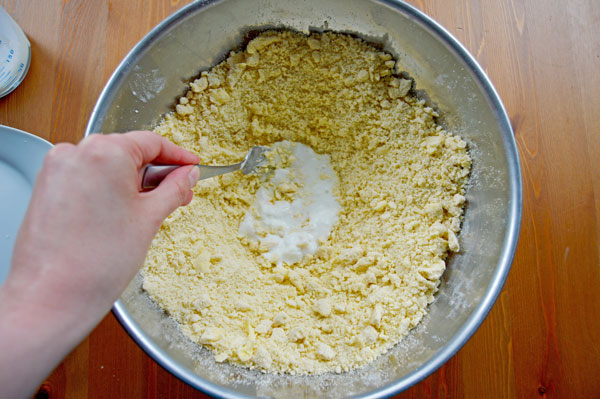
Now, check to see if you’ve added enough liquid or need more by squeezing a handful of dough in the palm of your hand. If it holds together easily, it is moist enough. If it is still really crumbly, stir in the rest of the buttermilk and check it again.
You’ve added enough buttermilk when the dough starts to form clumps and will hold together easily when pressed in the palm of your hand. The dough will feel moist but not wet and will remain crumbly.
I usually find myself adding the full 4 ounces of buttermilk, however, this can change based on the ingredients, temperature, humidity, and various other factors. Every dough can require a different amount of liquid.
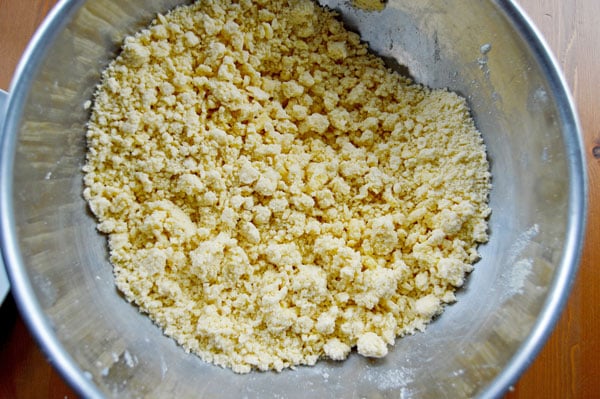
Once the dough is mixed, dump the bowl out onto a clean work surface and gently gather the dough into a loose mound.
I use a rolling mat but counter tops and marble or wood surfaces work well too.
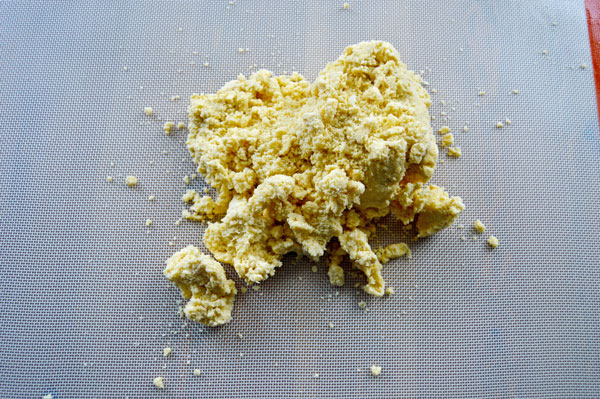
Now, we use a technique called frisage. This is a classic French technique that incorporates streaks of butter into the dough without working it too much. It may be a little different at first but don’t be intimidated.
Place the heel of your hand in the center of the mound and push the dough away from you, about 6-8 inches. You are essentially smearing it across the table.
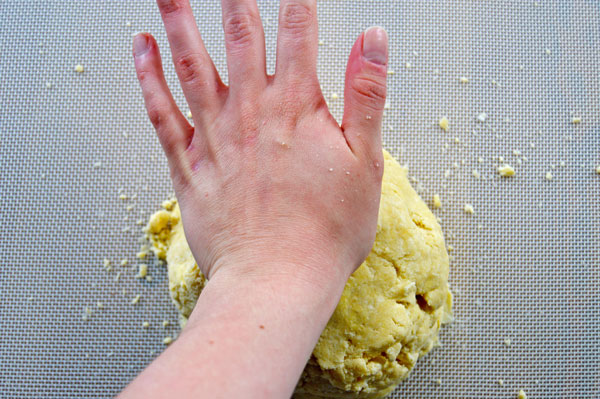
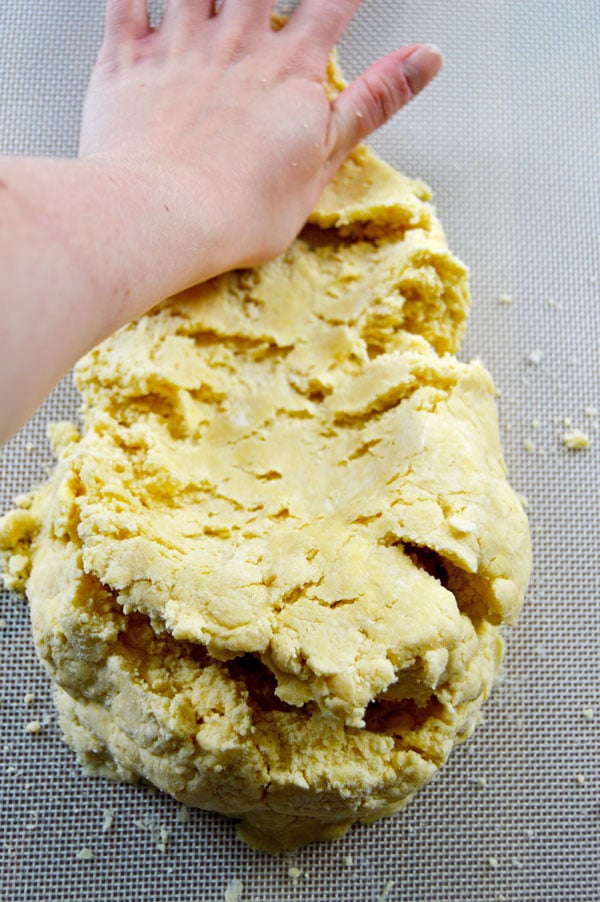
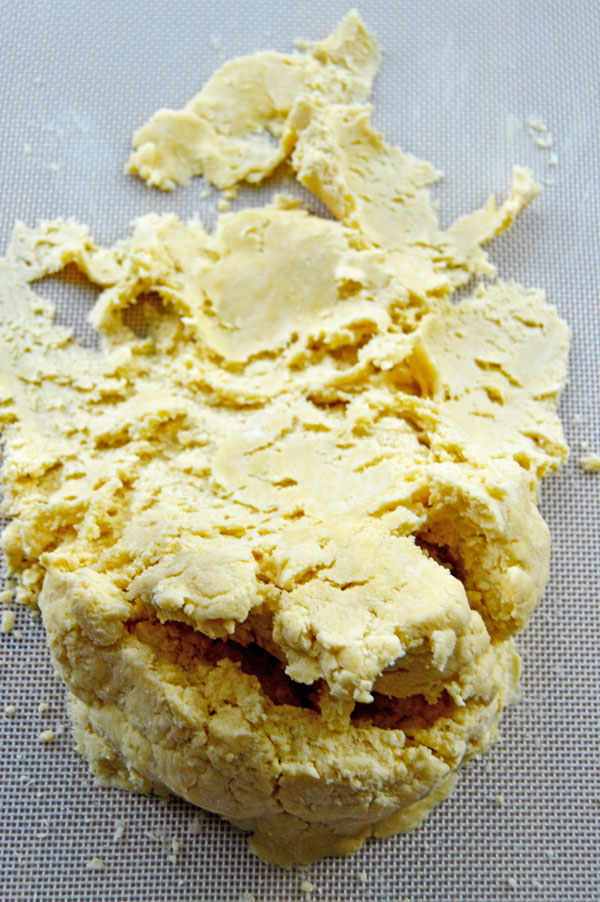
Continue using the smearing motion to work across the dough
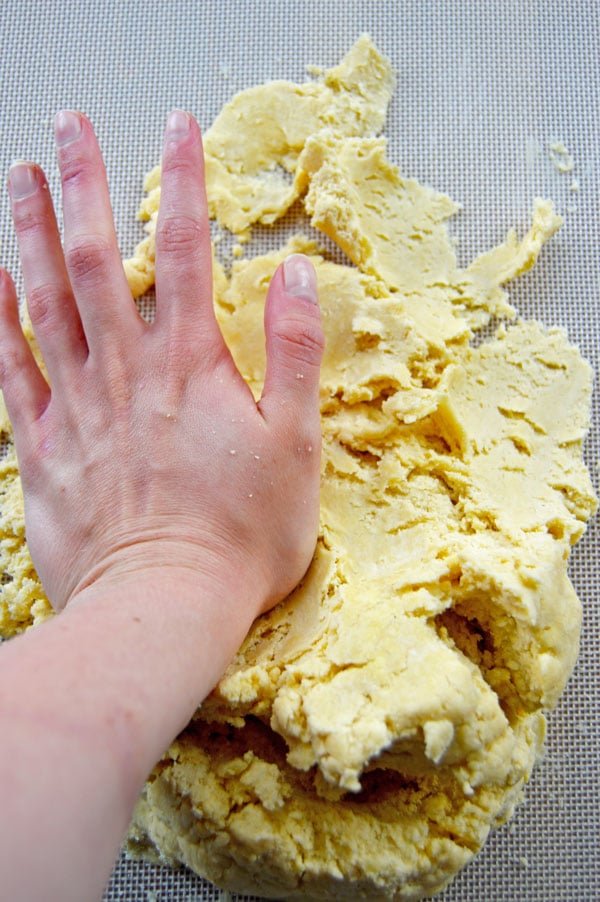
Once the dough is completely smeared across the table, it should no longer be crumbly and will look and feel like a more supple dough.
If the dough is still crumbly around the edges, you can mound it back up in the center and smear it out a second time.
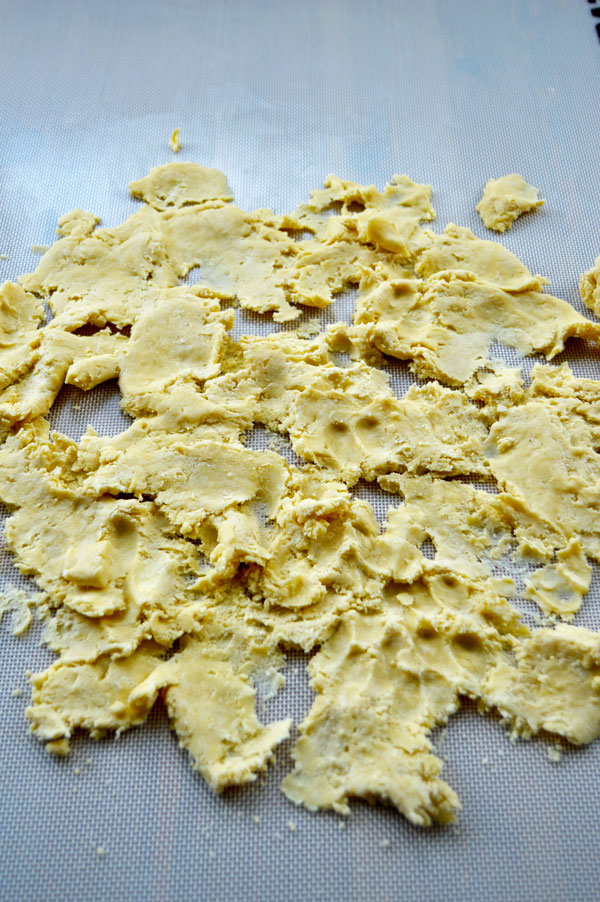
Once the dough has been smeared, use the bench scraper to mound it back up in the center.
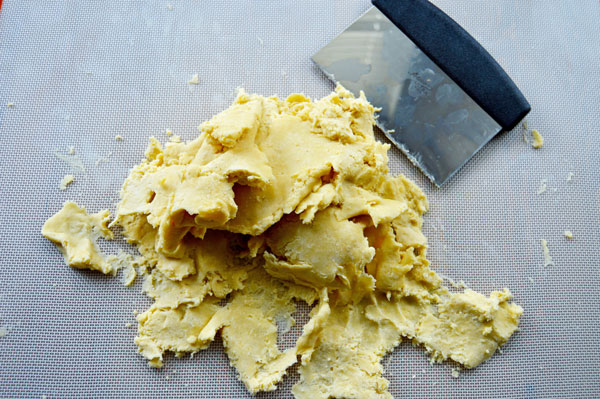
Now, use your bench scraper to divide the dough in half. You can eyeball this but I prefer to use a scale to make sure I portion them equally.
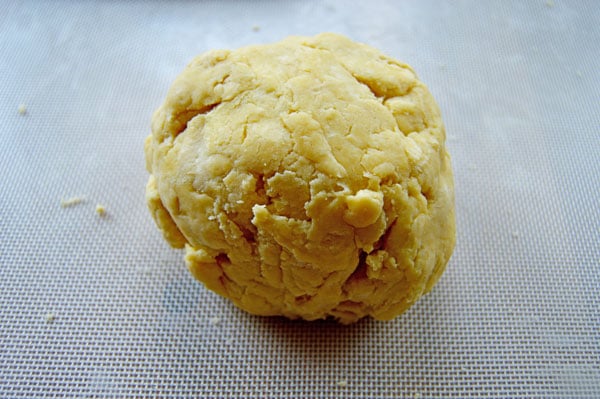
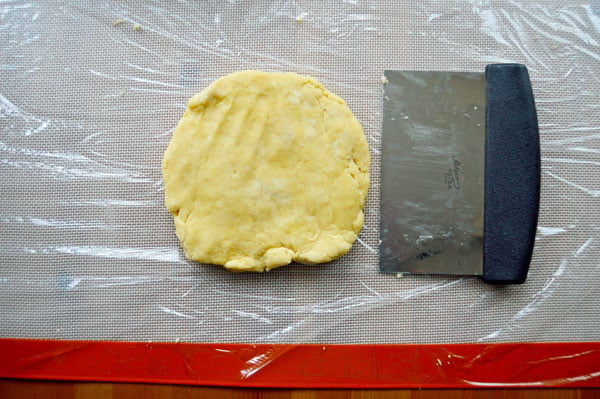
Take half of the dough and pat it into a flat, thick disk about 6 inches in diameter. You can use your bench scraper to measure – the disk of dough should be about the size of the bench scraper in both width and length. Repeat with the second half of dough.
Now, wrap the disks in plastic wrap and refrigerate them for at least one hour or up to three days.
Jordan Hamons | [The Hungry Traveler|http://www.thehungrytravelerblog.com" target="_blank]
Yields 2
Ingredients
2 sticks (227 grams / 8 ounces) unsalted butter, very cold
2 3/4 cups + 2 tablespoons (363 grams / 12.8 ounces) all-purpose flour
3/4 teaspoon kosher salt
1/4 teaspoon flaky sea salt (such as Maldon)
1/2 cup (4 ounces) buttermilk (or water), very cold
For rolling out the dough:
Egg wash (1 egg whisked with 1 tablespoon of water)
Demerara or Turbinado sugar (optional)
Instructions
Take the butter and divide it into two parts: about three-fourths and one-fourth. Cut the larger portion (three-fourths) of butter into small pieces, about 1/4-inch cubes or smaller. Cut the smaller portion (one-fourth) of butter into a bit larger pieces, about 1/2-inch cubes. Place the diced butter into the freezer until you are ready to use it.
Combine the flour and salts in a medium mixing bowl and stir with a fork to distribute.
Add the larger portion of butter (the three-fourths portion that was cut into smaller 1/4 inch cubes) to the bowl. Quickly toss the butter to coat it with flour. Use your fingers to rub the butter pieces into the flour. Continue to rub the butter into the flour until no large chunks remain and the mixture looks like coarse meal.
Add the remaining butter (the one-fourth portion of larger 1/2-inch cubes) and use your hands to rub it into the flour. Continue rubbing the butter into the flour until it is in pea-sized pieces and the rest looks like coarse meal. You will be able to see visible chunks of butter and that is a good thing.
Make a well in the center of your bowl and pour in about half of the buttermilk. It should form a pool and not soak into the flour right away. This is how you know you did a good job working the butter into the flour.
Use a fork to gently toss the buttermilk into the flour mixture until the buttermilk is absorbed. Gradually add the remaining buttermilk 1-2 tablespoons at a time. Between additions, check the dough by squeezing a small amount in the palm of your hand. If it holds together easily, it is done. The dough is ready when it feels moist but crumbly and starts to form clumps. It should not feel wet but will hold together when pressed in the palm of your hand.
Turn the mixture onto your work surface and gently gather it into a small mound. Using the heel of your hand, push the dough away from you and smear the mixture across the surface of the table (this is a technique called frisage). Use your hand and continue smearing the dough outward until what was once a mound of dough is now completely flat and smeared across the table. You want it to lose the crumbly appearance and look more like supple dough. It will look marbleized with streaks of butter throughout and the edges should no longer be crumbly.
Gather the dough using a bench scraper and press it into a ball. Divide the dough into two equal portions and shape each ball into a flat, thick disk about 6 inches in diameter. Wrap each dish in plastic wrap and chill for at least 1 hour before rolling.
When ready to roll out the dough, remove one chilled disk of dough from the refrigerator. While it is still in the plastic wrap, use a rolling pin to gently thump the disk of dough a few times until it is pliable and flexible.
Unwrap the dough and place it in the center of a work surface lightly dusted with flour. Lightly dust the top of the dough and your rolling pin to prevent sticking.
Place your rolling pin horizontally across the center of the dough and begin rolling upwards by pressing the rolling pin away from you (towards 12 o’clock) in one even stroke. Stop before you roll over the edges, leaving about 1/4-inch unrolled.
Lift the pin, spin the dough 1/8 turn (somewhere between 1 o’clock and 2 o’clock) and roll upwards again. Continue rolling in single upwards strokes and rotating the dough 1/8 turns until the dough is about 1/8-inch thick and about 2-3 inches larger than your pie plate. Be sure to add more flour to your work area or rolling pin if the dough starts to stick in any spots.
When the dough reaches the desired size, brush away excess flour from the top. Fold the dough in half and brush away more flour. Finally, fold the dough in half one more time (it will now be in quarters) and brush away the last bits of flour.
Transfer the folded dough to your pie plate, position it evenly, and unfold it. Gently ease the dough into the pie plate, adjusting it to fit evenly and press it down into the bottom edges. Do not stretch or pull. It should fit loosely and be comfortably resting in the plate.
Use kitchen shears to trim the dough overhang to 1 1/2 inches of excess hanging over the edge of the pie plate. Roll the excess dough underneath (an actual roll like a sleeping bag, not just a tuck or fold) and let it sit on the edge of the pie plate. It should be even with the rim of the plate. Finish the edge by crimping or using your desired decorative edge.
Use the tines of a fork to poke holes all over the bottom and sides of the dough. Freeze the dough for 30 minutes or refrigerate for at least an hour.
Once the dough is chilled, line the chilled crust with crinkled up parchment paper. Fill the pie cavity to the top edge of the crimp with dried beans or pie weights, making sure to press them into the bottom edges and up the sides.
Bake the crust at 375 for 20-22 minutes or until the crust starts to dry out and the crimped edges are set. Remove the beans and parchment paper and bake for another 8-12 minutes or until the bottom is golden brown.
If you ARE baking your filling, brush the edges of the crust with egg wash and sprinkle with crunchy sugar then fill and bake the pie according to recipe directions.
If you are NOT baking the filling, brush the edges of the crust with egg wash and sprinkle with crunchy sugar. Continue to bake the crust for another 10-12 minutes or until it is a deep golden brown. Follow recipe instructions for filling.
Once you have the bottom crust positioned in the pan and pressed into the edges, trim the edge to allow 11/2 inches of excess overhang.
Use the same rolling method to roll out the top crust until it is 1/8-inch thick and about 11/2 inches larger than the pie plate.
If baking a fruit pie, sprinkle the bottom of the pie crust with 1 teaspoon of all-purpose flour and 1 teaspoon of sugar. This helps thicken the juices and keeps the bottom crust crisp. Fill the pie with the filling according to recipe instructions.
Place the top crust over the filling. Roll the top and bottom edges together underneath the bottom dough and pinch gently to seal. Crimp the edges or finish with your desired decorative edge. Brush the edges and the top crust with egg wash and sprinkle with crunchy sugar. Use a pairing knife to cut vents in the top crust. Bake the pie according to recipe instructions.
Notes
1 teaspoon of kosher salt can be used instead of the combination of salts. Water can be substituted for the buttermilk.
Recipe adapted from Zingerman's Bakehouse Recipe
Next Up: All Butter Pie Crust – Part 2: How to Roll Out Pie Dough

 Save Recipe
Comments