
Nothing compares to a great cheese board! Learn how to make a cheese board — from choosing cheeses & picking accompaniments to composing it all on a board!
One of my favorite things to do is put together an impressive cheese board. Not only are they fun to make, but they are always the star of the party or cocktail hour. It can be a bit daunting to figure out how to make a cheese board, so today I wanted to share some of my tips and tricks.
It’s easier than it looks and I promise you can’t mess it up. Just remember, with cheese, charcuterie, and wine… you really can’t go wrong!
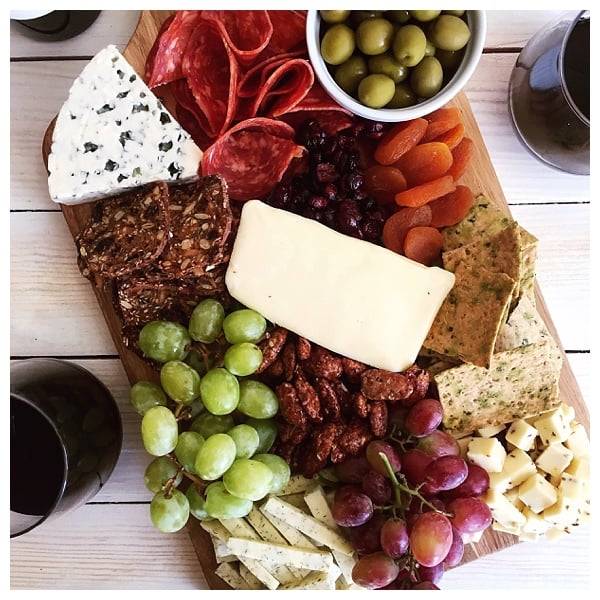
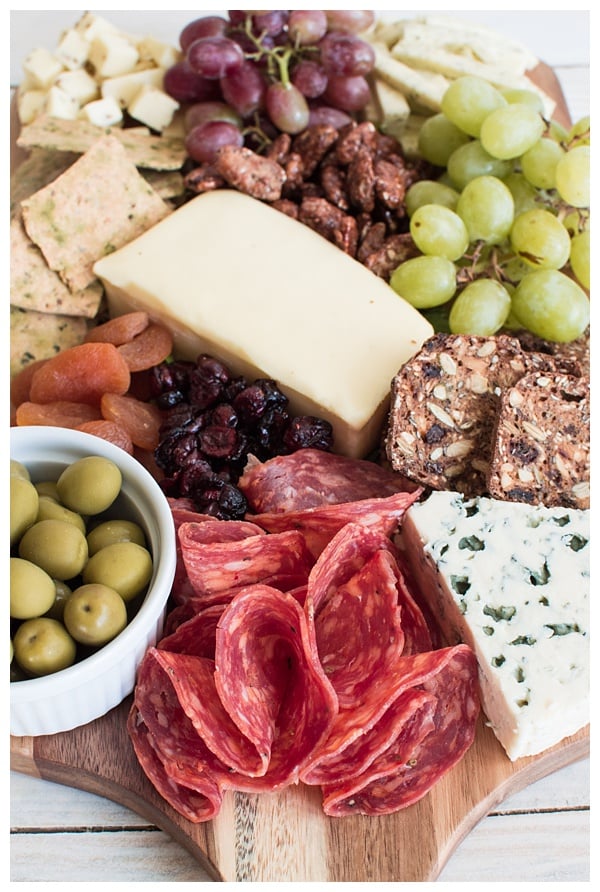
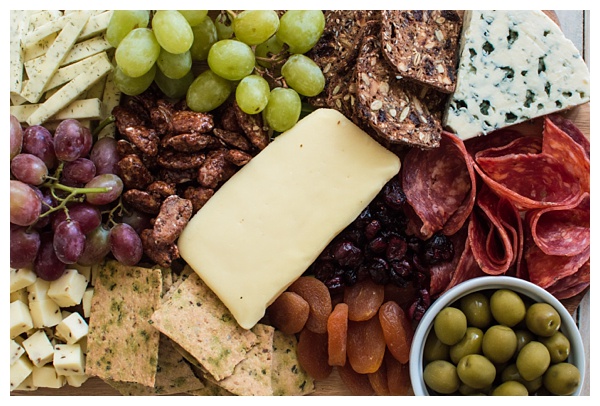
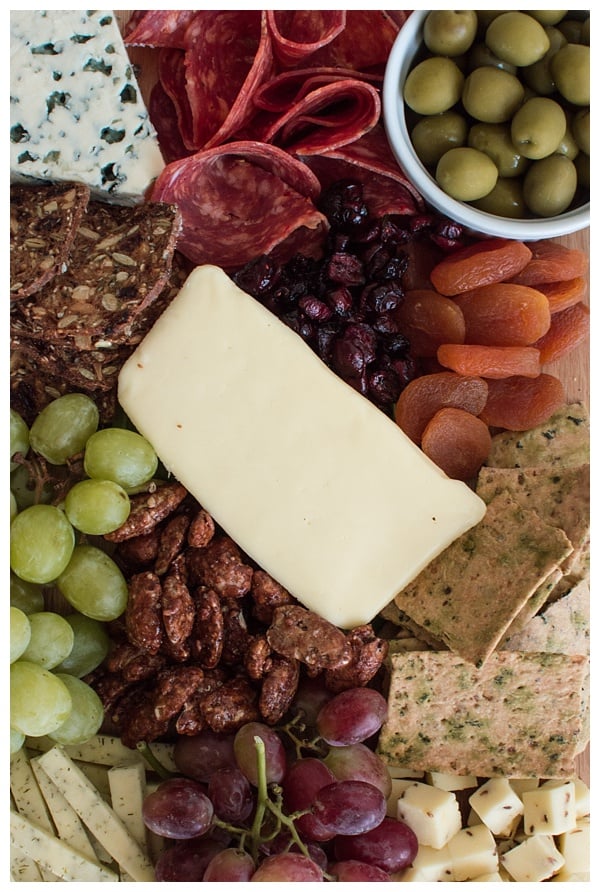
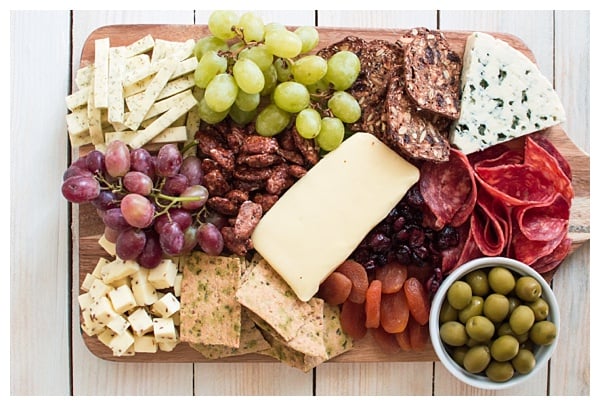
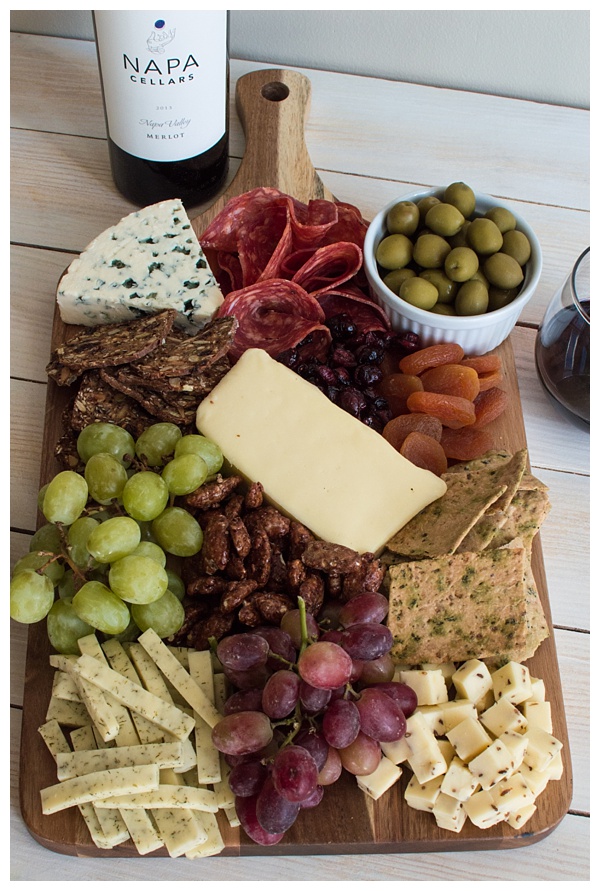
It all starts with good ingredients and a pretty composition. Once you find some of your favorite main stay ingredients, you can change up the others based on the season. For this board, I went with a harvest theme and added dried cranberries, oat crisps, and beautiful holiday grapes.
How to Make A Cheese Board — Ingredients
Cheese — I recommend getting at least 3-5 different kinds of cheeses. I usually go with an odd number because it looks better on the board. You can mix up the type of milk (i.e. cow, sheep, goat) and the type/texture of cheese. Try to pick a firm cheese (such as cheddar) and a soft, creamy cheese such as Brie. I also like to include a strong cheese, like Danish Blue, and something a bit more mild like Havarti. Plan for about 3 ounces of cheese per person. I used Castello Traditional Danish Blue, Castello Havarti Creamy, Castello Havarti Caraway, and Castello Extra Mature Cheddar.
Fresh Fruit — I love to put fresh fruit on my cheese boards. Grapes are great and berries are always easy. Apples and pears are delicious but just remember that they will oxidize and turn brown if sitting out for too long. Fresh figs are beautiful when they are in season.
Dried Fruit — I used dried cranberries and dried Turkish apricots but you can use your favorite dried fruits.
Crackers — I love Raincoast Crisps and Raincoast Veggie Flats from Lesley Stowe. It’s fun to try all of the different flavor combinations and each one is absolutely delicious. You can find them at Whole Foods or at the Murray’s Cheese Shoppe counter inside of Kroger stores.
Charcuterie — Don’t forget to include your favorite charcuterie. Spicy salami is my favorite and I love to use Prosciutto too.
Olives — If you like olives, put them in a little bowl and include them on your board. I like to use Castelvetrano olives.
Nuts — Candied pecans are my go-to and Marcona almonds are great too. I like to have a mixture of sweet and salty. Scroll down for my go-to candied pecans recipe.
Dips and Spreads — I didn’t include any in these photos, but honey, jams, jellies, dips, and spreads are always welcome on a cheese board.
Wine — This doesn’t technically go on the board, but you need to have wine with your cheese board! This fall, my favorite wines are the 2013 Napa Valley Merlot from Napa Cellars and the Folie à Deux Alexander Valley Cabernet Sauvignon.
How to Make a Cheese Board — Composing the Board
- You can add interest to the board by cutting the cheeses into different shapes. Do some wedges, some cubes, and some sticks.
- Place the cheeses on the board first and then fill in with the other ingredients.
- When you start filling in the board with the other items, think about color and try to separate items that have similar colors. This will make the board more beautiful, colorful, and appealing.
- Keep items together in big piles. For example, you’ll have one big pile of cranberries, another big pile of candied nuts, etc.
- If there’s anything that can roll away (such as the olives), keep them contained in a small bowl or ramekin.
- Make sure to set the cheeses out at least 30 minutes before you plan to eat them. This helps bring out the aromas and flavors and makes sure the texture is correct.
To Make the Candied Pecans:
In a large bowl, toss together 1 cup pecan halves, 1/4 cup brown sugar, pinch kosher salt, pinch cayenne pepper, and 4 tablespoons melted butter. Spread the mixture out on a parchment paper lined baking sheet. Bake at 350 degrees F for 15-20 minutes or until the nuts are fragrant, crisp and toasted. Let cool.

This video has another great idea for a cheese board accompaniment. You can get the recipe for the butternut squash and cranberry spread here.
This post was sponsored by Castello Cheese. All opinions are my own.
Comments