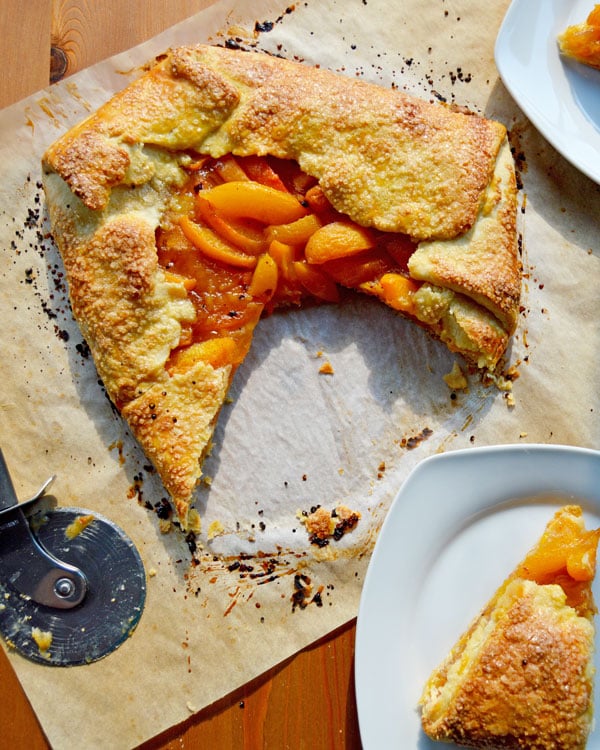
My first restaurant job was making sandwiches and salads at a small cafe that served healthy, seasonal and really delicious food. A few times a week the pastry chefs from the main restaurant would deliver baked goods to fill the large pastry case at the front of the cafe. While making sandwiches and salads wasn’t all that exciting, I always looked forward to the pastry delivery.
The pastry case was full of customer-favorites such as chocolate chip cookies and salted caramel cupcakes, but I was most excited by the mixed berry galettes that were nearly the size of my head. Ripe berries were stewed to a thick, jammy consistency and wrapped up into an envelope by golden brown pastry crust spinkled with coarse sugar crystals.
While these were by far the most delicious and beautiful item in the pastry case, the intimidating size and tough competition meant they were not a best seller. I rarely made it out of a shift without buying something from the pastry case, but the best days were the ones where I got to take home a galette that did not sell.
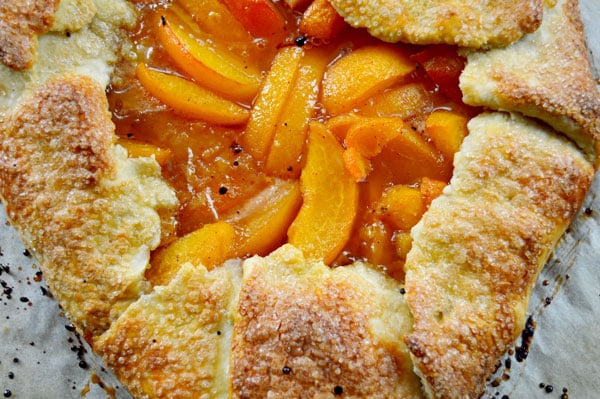
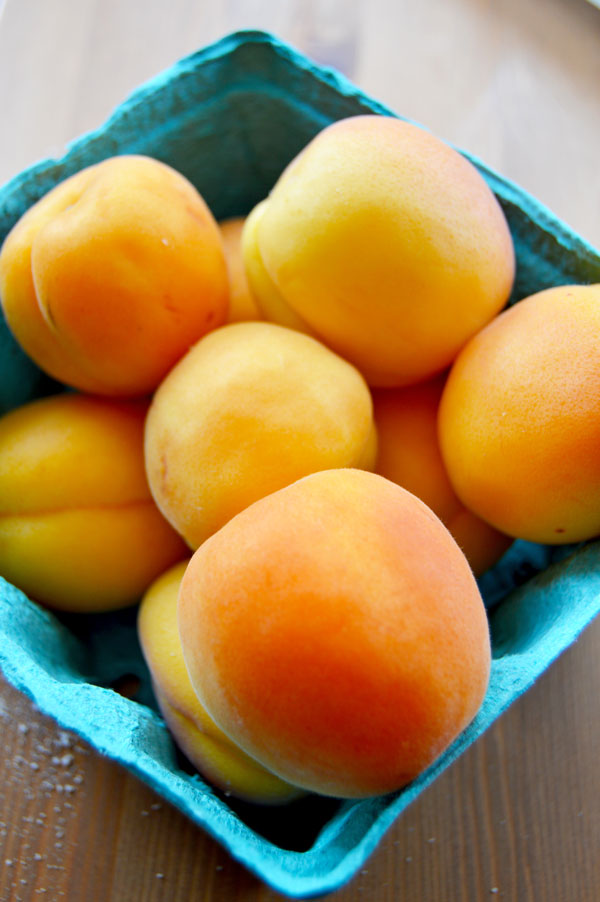
Unfortunately the cafe was short-lived and is no longer in existence. I often crave the food we served and find myself thinking about the pastries. I picked up some apricots at the market last week without knowing what I was going to do with them. On my drive home I passed the former space of the cafe and knew immediately where those apricots were headed – straight into an apricot galette.
So, what is a galette exactly? Galettes are ‘the oldest of all pastries’ and can be traced back to the Neolitic period according to Larousse Gastronomique. It gets a bit complicated because the term galette is used to refer to many different round baked goods.
A galette breton is a buckwheat crepe filled with a savory filling such as ham, cheese, or a fried egg. A galette de rois (king cake) is a flaky puff pastry cake with a frangipane center eaten in France on the day of Epiphany. And if you order a galette in Normandy, you may find yourself eating a crisp sablé butter cookie.
My favorite type of galette is the rustic French country dessert, a free-form fruit tart that is less fussy and formal than a traditional pie or French tart. Fruit is placed in the center of a round sheet of pastry and the dough is folded in to enclose the fruit. You get a larger ratio of crust to fruit and a great contrast between the crisp pastry crust and the jammy fruit.
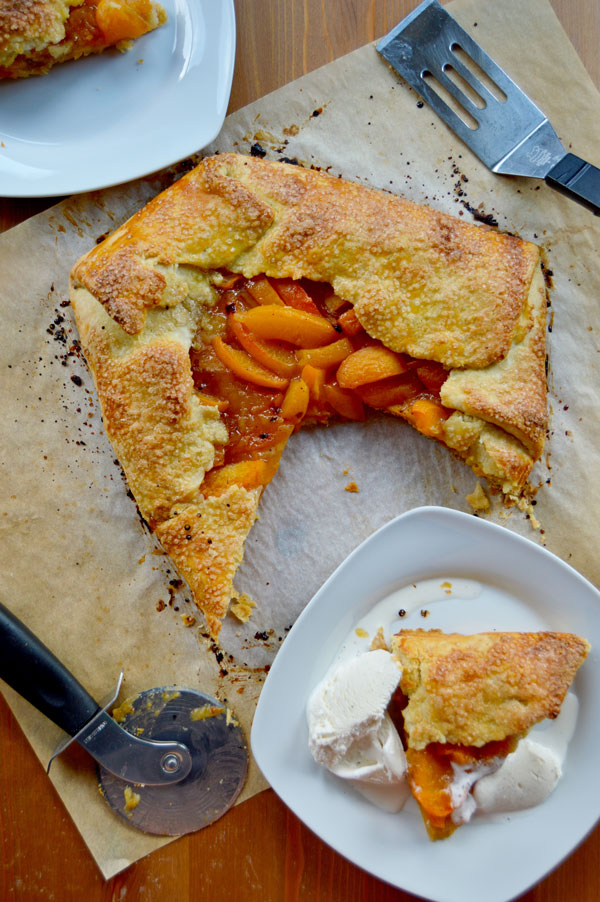
Galettes are a great way to get more comfortable with making pie dough. You get the practice of making the dough and rolling it out but don’t have to mess with lining the pie plate, crimping the edges, or blind baking. Galettes look effortlessly sophisticated and are sure to impress your friends and family.
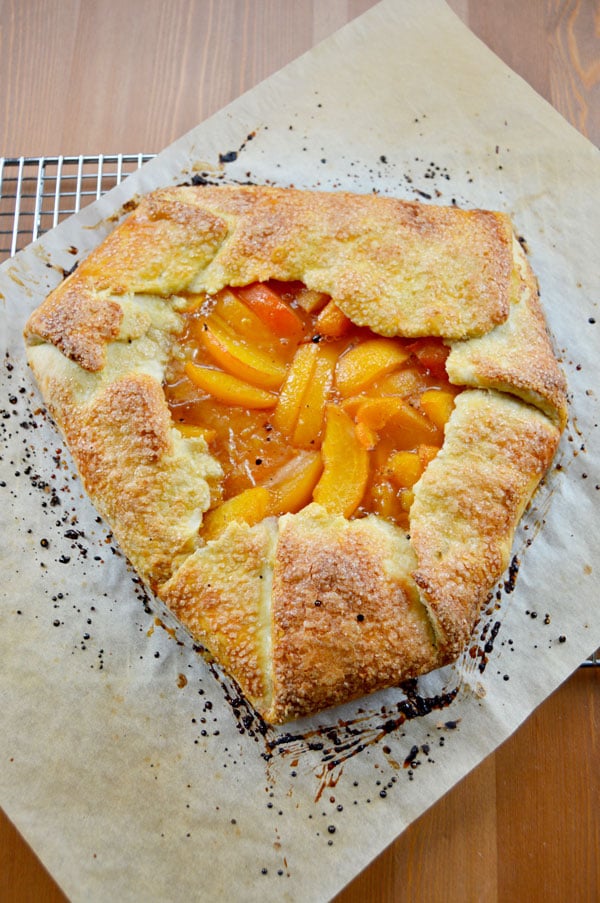
The base of this galette is my favorite all butter pie crust. Before you get started, be sure to review these pie crust tutorials:
All Butter Pie Crust – Part 1: Mixing the Dough
All Butter Pie Crust – Part 2: Rolling out the Dough
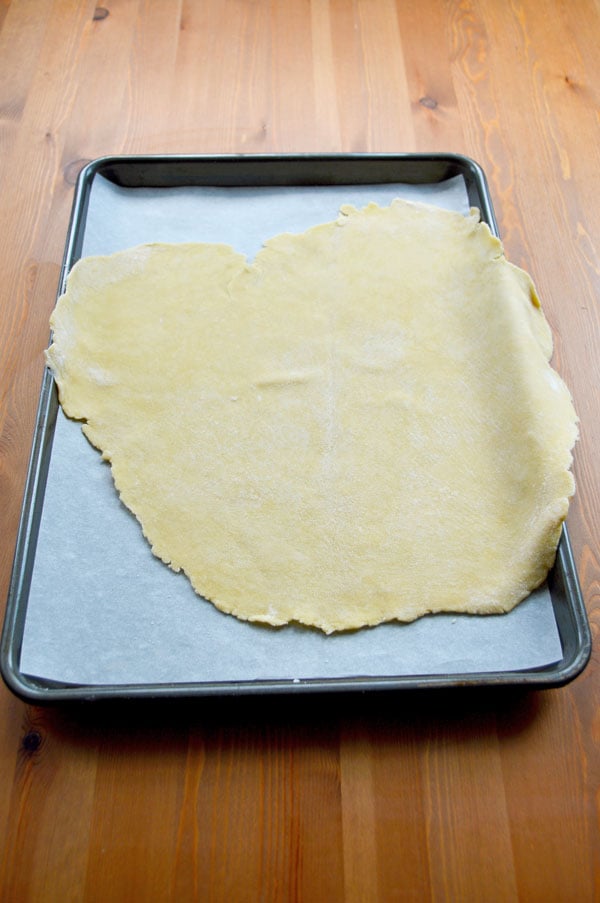
Start by rolling out the pie dough and transferring it to a parchment lined baking sheet. Try to get the dough placed evenly on the baking sheet so that when you add the fruit and fold the edges, the galette will be in middle of the baking sheet.
The dough will get folded over so it is not a big deal if your dough is not a perfect circle – it’s actually better if it’s not!
I’ve used apricots in this galette, but you can fill it with any fruit that is in season. To make the filling, the apricots are sliced and then tossed together with some sugar, vanilla extract and spices. I let the mixture sit and macerate while the dough chills. Be sure to taste the filling and adjust the sugar accordingly, adding more or less depending on the sweetness of the fruit.
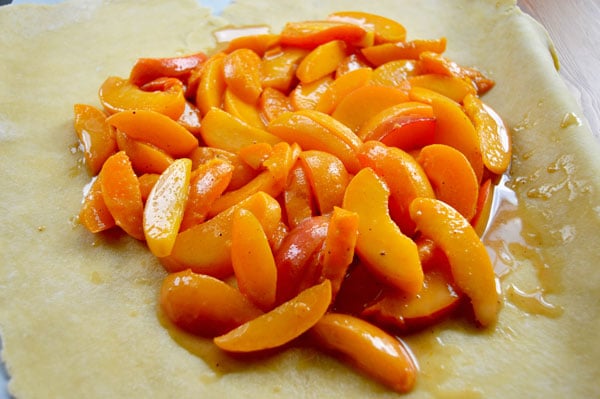
Pour the apricots into the center of the dough. I arranged them a little bit to make sure they were in a singular layer. You can get fancy and arrange them in concentric circles but I appreciate the rustic free-form look. Don’t forget to pour the accumulated juices over the top of the fruit.
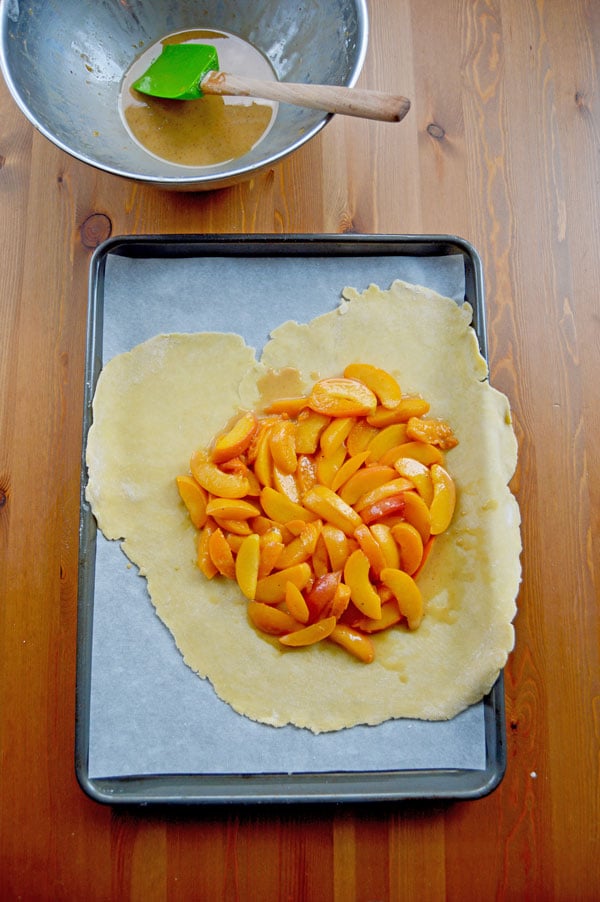
Galettes are meant to be rustic. They should be irregular in shape so if your rolling skills need a little work, there is nothing to worry about. You can fold the dough over as much or as little as you like. Some galettes have a small edge and let the beautiful fruit show though while others are folded so that the dough covers the fruit almost completely. I tend to go somewhere in the middle.
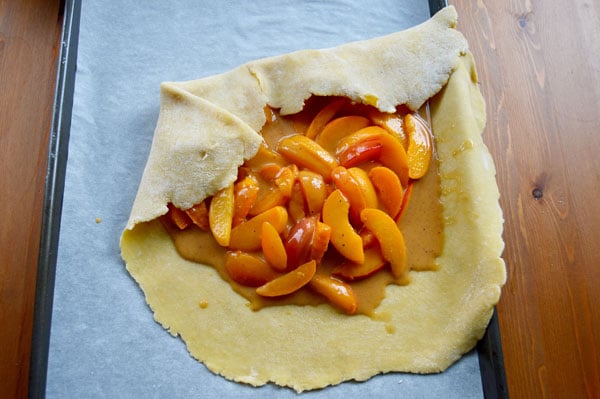
Continue folding and working your way around the galette. You can add pleats where they occur naturally in the dough. There is no right or wrong way to fold and pleat the dough. You can get particular and make even pleats all the way around but I just let the dough go where it happens to fold naturally.
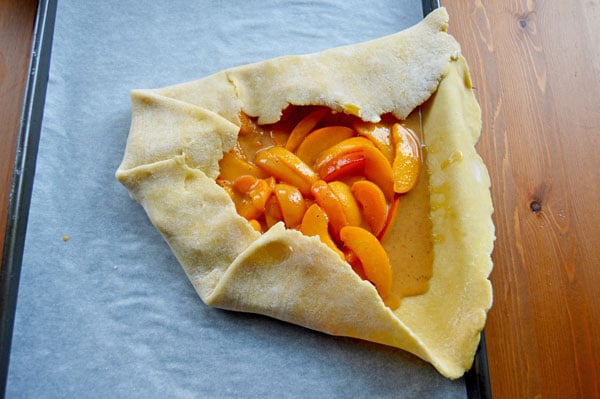
Brush the edges and sides with egg wash and sprinkle the entire galette generously with crunchy sugar such as demerara or turbinado. Chill the galette for at least 30 minutes or up to 1 hour before baking.
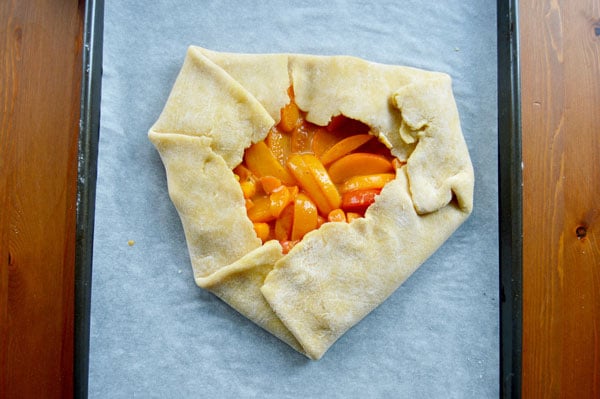
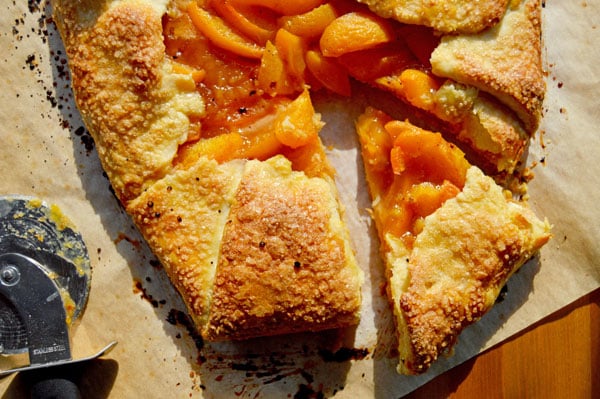
The galette will bake for about 35-50 minutes. You know it is done when the fruit is bubbling and the crust is crisp and a deep golden brown. Let the galette cool for a few minutes in the pan and then use the parchment paper to carefully transfer it to a cooling rack.
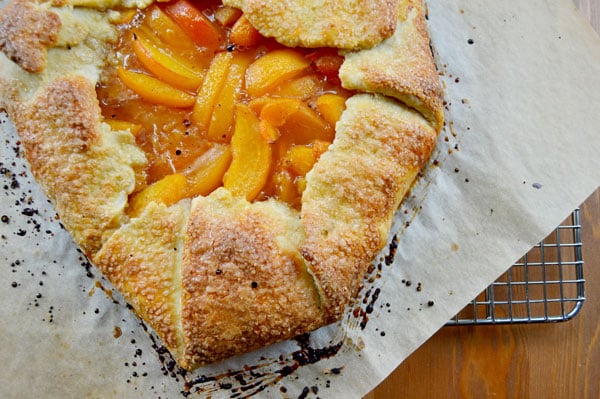
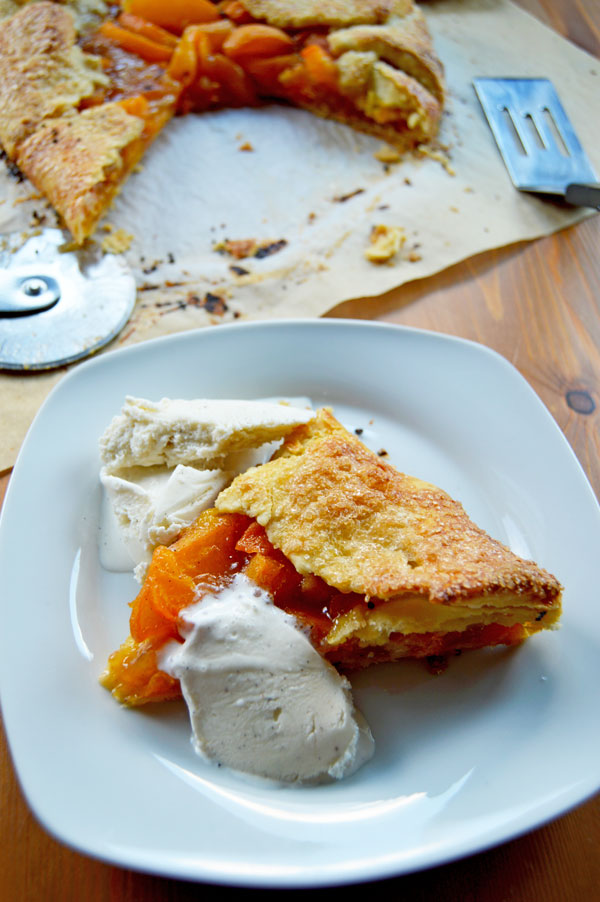
Galettes are best served straight from the oven when the crust is crisp and the fruit is warm. Slice it and add a scoop of vanilla ice cream or whipped cream. Leftovers can be wrapped and left at room temperature for 2 days. A slice of apricot galette makes a perfect breakfast.
Jordan Hamons | [The Hungry Traveler|http://www.thehungrytravelerblog.com" target="_blank]
Yields 1
1 hr
1 hr
2 hr
Ingredients
1 stick (113.5 grams / 4 ounces) unsalted butter, very cold
1.5 cups (181.5 grams / 6.4 ounces) all-purpose flour
1/2 teaspoon kosher salt
1/4 cup (2 ounces) buttermilk (or water), very cold
7 apricots, halved, pitted, and thinly sliced (about 3 cups sliced apricots)
1/2 cup (100 grams / 3.5 ounces) dark brown sugar
1/8 teaspoon kosher salt
1/4 teaspoon vanilla extract
2 teaspoons lemon juice
4 tablespoons cornstarch
1/8 teaspoon ground nutmeg
1/8 teaspoon ground cinnamon
1/8 teaspoon almond extract
Egg wash (1 large egg whisked with 1 tablespoon of water)
Crunchy sugar such as demerara or turbinado
vanilla ice cream or whipped cream
Instructions
Take the butter and divide it into two parts: about three-fourths and one-fourth. Cut the larger portion (three-fourths) of butter into small pieces, about 1/4-inch cubes or smaller. Cut the smaller portion (one-fourth) of butter into a bit larger pieces, about 1/2-inch cubes. Place the diced butter into the freezer until you are ready to use it.
Combine the flour and salt in a medium mixing bowl and stir with a fork to distribute.
Add the larger portion of butter (the three-fourths portion that was cut into smaller 1/4 inch cubes) to the bowl. Quickly toss the butter to coat it with flour. Use your fingers to rub the butter pieces into the flour. Continue to rub the butter into the flour until no large chunks remain and the mixture looks like coarse meal.
Add the remaining butter (the one-fourth portion of larger 1/2-inch cubes) and use your hands to rub it into the flour. Continue rubbing the butter into the flour until it is in pea-sized pieces and the rest looks like coarse meal. You will be able to see visible chunks of butter and that is a good thing.
Make a well in the center of your bowl and pour in about half of the buttermilk. It should form a pool and not soak into the flour right away. This is how you know you did a good job working the butter into the flour.
Use a fork to gently toss the buttermilk into the flour mixture until the buttermilk is absorbed. Gradually add the remaining buttermilk a few drops at a time. Between additions, check the dough by squeezing a small amount in the palm of your hand. If it holds together easily, it is done. The dough is ready when it feels moist but crumbly and starts to form clumps. It should not feel wet but will hold together when pressed in the palm of your hand.
Turn the mixture onto your work surface and gently gather it into a small mound. Using the heel of your hand, push the dough away from you and smear the mixture across the surface of the table (this is a technique called frisage). Use your hand and continue smearing the dough outward until what was once a mound of dough is now completely flat and smeared across the table. You want it to lose the crumbly appearance and look more like supple dough. It will look marbleized with streaks of butter throughout and the edges should no longer be crumbly.
Gather the dough using a bench scraper and press it into a ball. Shape the ball into a flat, thick disk about 6 inches in diameter. Wrap the disk in plastic wrap and chill for at least 1 hour before rolling.
While the dough is chilling, prepare the filling. Add all of the filling ingredients to a medium bowl and gently stir until everything is combined and the fruit is evenly coated with the spices. Taste and adjust the flavors as needed. Set aside and let macerate until the dough is chilled.
Preheat the oven to 400-degrees with a rack in the center. Line a baking sheet with parchment paper and set aside.
Once the dough is thoroughly chilled, remove it from the refrigerator. On a lightly floured surface, roll the dough into about a 14-inch diameter circle about 1/8-inch thick. Gently fold the dough into quarters and brush off any excess flour. Transfer the dough to the center of the prepared baking sheet and unfold. It’s okay if it hangs off the edges of the baking sheet.
Arrange the apricot mixture in the center of the dough, leaving 2-3 inches of dough bare along the edges. If any juices have accumulated in the bowl, pour them over the center of the fruit.
Grab a piece of loose dough and fold it over the filling towards the center of the galette. Continue working around the galette letting the dough fold over where it feels natural and creating a few pleats where needed. Continue until you have used all of the excess dough and created a rim of crust enclosing the fruit in the center.
Brush the edges and sides of the dough with egg wash and sprinkle generously with the crunchy sugar. Place the baking sheet in the refrigerator and chill the galette for at least 30 minutes or up to an hour.
Bake the galette for 35-45 minutes or until the crust is golden brown and the fruit is bubbly. Let cool on the baking sheet for 5 minutes and then gently use the parchment paper to lift the galette and transfer it to a cooling rack. Slice it into thick wedges for serving. You can let the galette cool completely or serve it warm with vanilla ice cream or whipped cream.
Notes
The galette is best served on the day it is made but can be stored tightly wrapped at room temperature for 2 days. br]
For more information on making pie dough:
[All Butter Pie Crust - Part 1: Mixing the Dough[/url]
[url href=http://www.thehungrytravelerblog.com/all-butter-pie-crust-part-2-how-to-roll-out-pie-dough/ target=_blank title=All Butter Pie Crust – Part 2: How to Roll Out Pie Dough]All Butter Pie Crust - Part 2: Rolling out the Dough

 Save Recipe
Comments