During my junior year of college, I spent a semester studying in Toulouse, France. There were a few Canadian students in our study abroad group, and with the advantage of French as their first language, they seemed to figure out the city much quicker than we did.
It took us three days to get our French bank accounts set up; it took them 30 minutes. They understood the school schedule and easily got accepted into their desired classes. They knew where all of the happy hours and parties were happening across town. Meanwhile, we were trying to figure out how the washing machines worked at the laundromat. We hung out together at first but eventually they were too cool for us and only hung out with the French and German kids.

One afternoon on the bus, I saw one of the Canadian students snacking on a bag of little puffs covered with sugar. Intrigued, I asked her what they were. Veronique replied, “Umm Chouquettes,” in a way that expressed her complete disbelief that I was unfamiliar with the pastry.
I don’t like being ‘big-leagued’ when it comes to pastries, so as soon as we got back to the bus stop, I made a mad dash to the closest bakery and got acquainted with chouquettes.
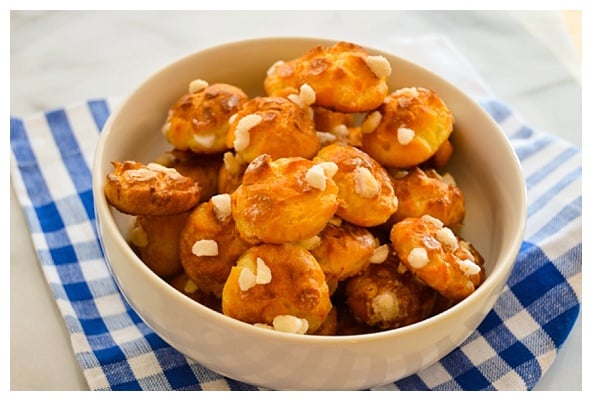
Chouquettes, also known as sugar puffs, are found in bakeries all over France, usually in a basket on top of the pastry case. Sold by weight, the baker will scoop your desired amount into a small bag and send you on your way. For whatever reason, chouquettes are not that well known in the US.
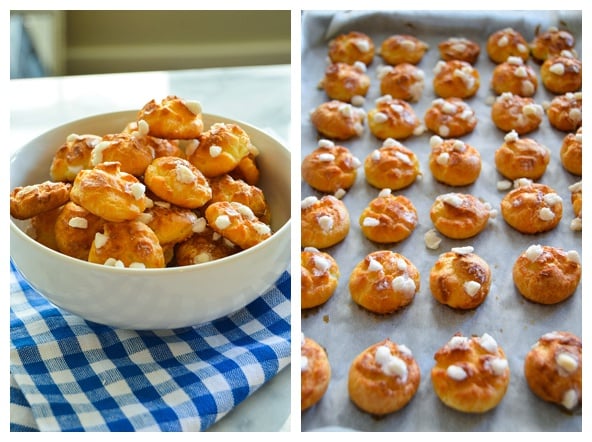
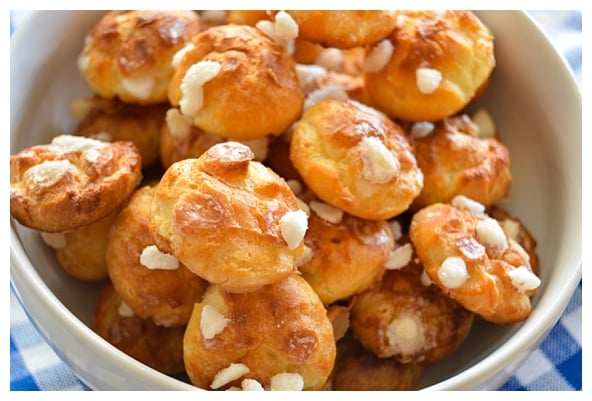
Chouquettes have a hollow and slightly eggy inside and a crisp shell outside. Pearl sugar gives the puffs a delicate sweetness and crunch. They are a perfect, delicious snack that isn’t heavy but is completely satisfying.

I’m not sure if there’s a pastry that’s easier to make. Chouquettes are simply pâte à choux (the dough used to make éclair and cream puff shells) sprinkled with pearl sugar and baked until puffed and golden brown. Pâte à choux may seem a bit complicated when you read the recipe, but I promise it comes together quickly and easily. If you have leftover choux dough from something else or want to practice piping skills, chouquettes are a great option. They also freeze well so you could keep them frozen and unbaked and pop them in the oven when the occasion arises.
I don’t keep in touch with the Canadian students, but I’m sure happy that they introduced me to chouquettes.

Helpful Tools and Ingredients
Pearl Sugar – These make the chouquettes! You can buy Swedish (smaller) or Danish (larger) pearl sugar based on your preferences.
18-inch Pastry Bags – I always buy 16- or 18-inch pastry bags. These come in a roll or easy storage and are much less expensive than what you can buy in stores.
1/2 inch Pastry Tip – My favorite size for piping chouquettes. It can be hard to find in stores.
Parchment Paper – Pre-cut parchment sheets make baking so much easier.
Jordan Hamons | The Hungry Traveler
Yields 60
Ingredients
1/2 cup whole milk
1/2 cup water
1 stick (113 grams) unsalted butter
1 tablespoon sugar
1/4 teaspoon kosher salt
1 cup (120 grams) all purpose flour, sifted
4 (200 grams) large eggs
1/2 cup pearl sugar
Egg Wash (1 egg whisked with 1 tablespoon of water)
Instructions
Preheat the oven to 400 degrees and line a baking sheet with parchment paper or a silicone baking mat.
In a medium saucepan, bring the milk, water, butter, sugar, and salt to a boil.
Just when the mixture reaches a boil, remove the pan from the heat and add all of the flour at once. Whisk vigorously until the mixture comes together into a uniform mass and no lumps of flour remain.
Place the pan back on the stove over medium heat to cook the flour. Using a wooden spoon, stir the mixture until it dries out and forms a ball in the pan, about 1 minute. The mixture will start to stick to the bottom of the pan and you will hear a faint hissing sound when it is ready. Remove the pan from the heat.
Transfer the dough to a stand mixer fitted with the paddle attachment. Mix the dough on medium speed for about 1 minute to release steam and cool it off. Turn the mixer to low and start gradually adding the eggs one at a time. Do not add another egg until the previous egg is full incorporated. Half way through adding the eggs, turn the mixer off and scrape down the sides and bottom of the bowl. Continue with the remaining eggs.
To test the consistency of the dough, remove the paddle attachment from the mixer. The dough should be hanging off the paddle and forming a v-shape.
Transfer the dough into a pastry bag fitted with a 1/2-inch plain tip and pipe the chouquettes into 1 1/2 inch rounds onto the prepared baking sheet, leaving at least one inch of space between each puff.
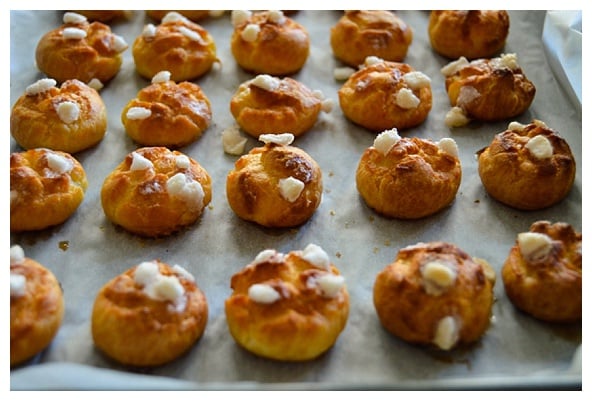
Brush the top of each mound with the egg wash and then generously press some pearl sugar into the top and on the sides.
Bake the chouquettes at 400 degrees until they are puffed, about 10-12 minutes. Once they have risen, lower the oven temperature to 325 and let the dough dry out and brown. The chouquettes are done when they are a deep golden brown on the outside and hollow on the inside, about 25-30 minutes.
Notes
Make Ahead and Storage Instructions
Chouquettes are best the day they are made. You can freeze the raw dough and take them straight from the freezer into the oven. Just increase the baking time by a few minutes. You can freeze the baked chouquettes in a zipper-top freezer bag but thaw them in the refrigerator and re-crisp them in a 350 degree oven before serving
For more recipes, click here to subscribe to my mailing list and receive a new recipe in your inbox every week!

 Save Recipe
Comments