I have a tendency to overdo it when I travel. I get excited and want to do everything. The more guidebooks and blogs I read, the more plans I make. My friends and family remind me that “You can’t do everything” and I politely ignore their advice.
This was the case during my last trip to Paris. By the time I left for the airport, I had something planned for nearly every minute of the six days I was staying in the city. The trip started off well and every meal, tour, and experience was beyond my expectations. I was on a traveler’s high but eventually, the jetlag and exhaustion from going non-stop set in and I hit a wall. That’s not a good feeling when you’re in the first few days of over a month of non-stop travel.
By the fourth day of my trip, I was exhausted. I stayed out way too late (blame it on Anto!) and was planning on ‘calling in sick’ to the cooking class I had scheduled for the next morning. I had visions of sleeping in, getting room service, and taking it easy.
Luckily my fear-of-missing-out kicked in and I got my butt out of bed and headed up to Montmartre for the Cook’n with Class Morning Market Class. Although my head hurt and I was running on 3 hours of sleep, I wasn’t about to waste a precious day in Paris.
The Cook’n with Class Morning Market Class starts with a guided visit to a traditional Parisian market to buy the ingredients to use in the cooking class. We met Chef Constance and she led us through the market with stops at her favorite butcher, boulangerie, cheese shop, fish monger, and produce stand.
We didn’t have any recipes or a menu for what we would cook that afternoon. We visited the different shops and simply bought what looked good that day. It’s a much different philosophy than how I normally cook. I often pick recipes and menus and then buy the ingredients accordingly. In this case, the ingredients wrote the menu.
When I asked Constance what we would make that day, she said she wasn’t sure yet, but whatever we made would be simple and the ingredients would shine.
After finishing the shopping, we headed back to the school to get cooking. With the theme of focusing on our ingredients, Constance suggested we make a simple tart that would showcase the rich French butter and a high-quality dark chocolate that the school had on hand.
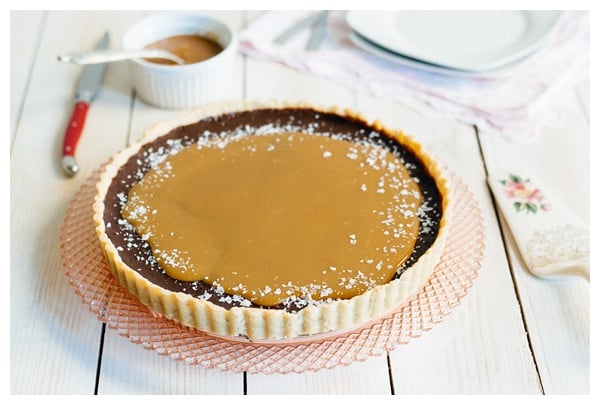
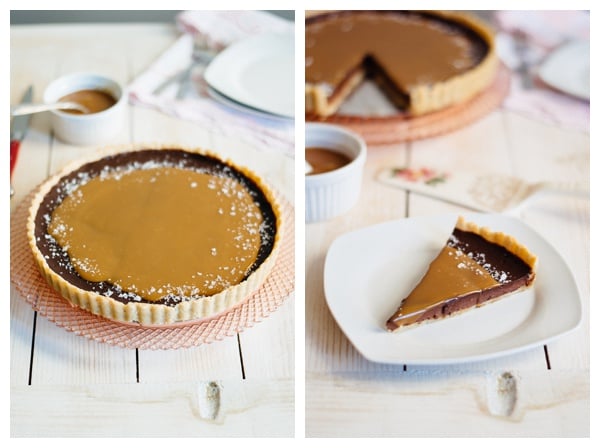
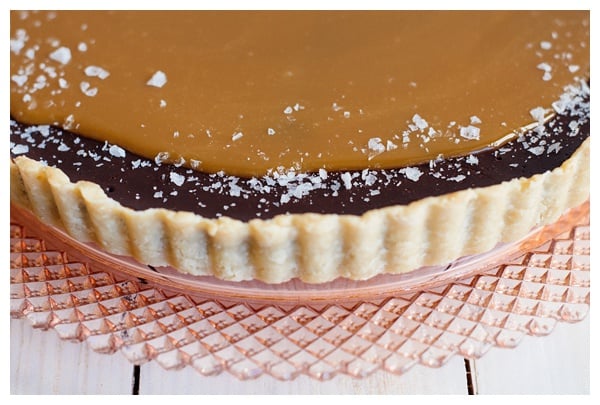
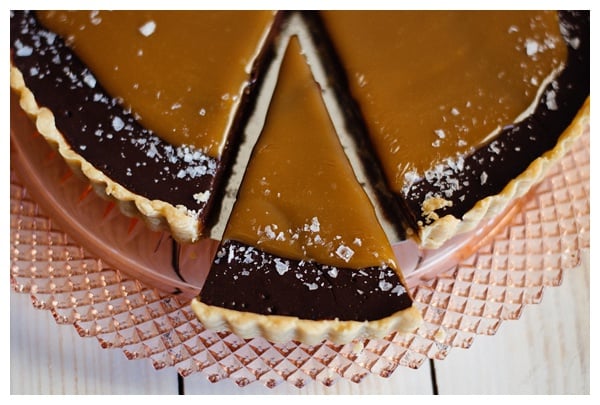
Our group decided on a classic French salted caramel chocolate tart made from a pâte sablée crust to highlight the fabulous butter, a rich chocolate ganache filling with dark chocolate and fresh cream, and a salted caramel sauce because we wanted to use even more of that butter. We garnished the tart with a sprinkle of the finest French sea salt.
Constance encouraged us to keep our cooking simple. The best dishes are often the ones where the cook does little but help the ingredients shine. It was a good reminder not to overdo things, whether cooking or traveling.
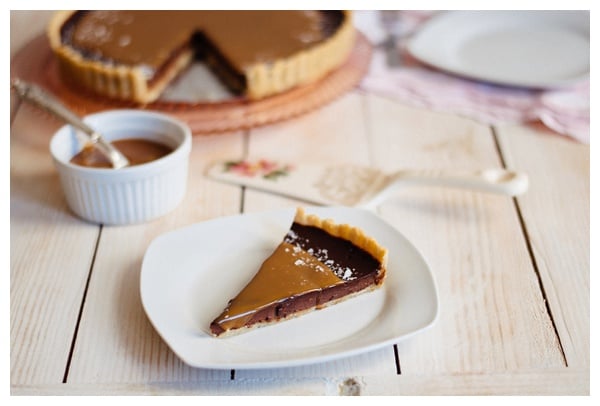
I’d be remiss if I didn’t thank the following people for their help in this recipe:
Thank you to my Aunt Nancy for giving me the cake plate (Depression glass!), cake server (vintage!), and napkin (also vintage!) for a Christmas present. Nancy has a great eye and the patience to find treasures at a flea market. I lack both of those. Aunt Nancy, you are welcome to gift me more food props at any time 🙂
Thank you to Mona Quintanilla and Jess Chen for testing the recipe.
Thank you to Chef Constance Deledalle and Cook’n with Class Paris for inspiring the recipe.
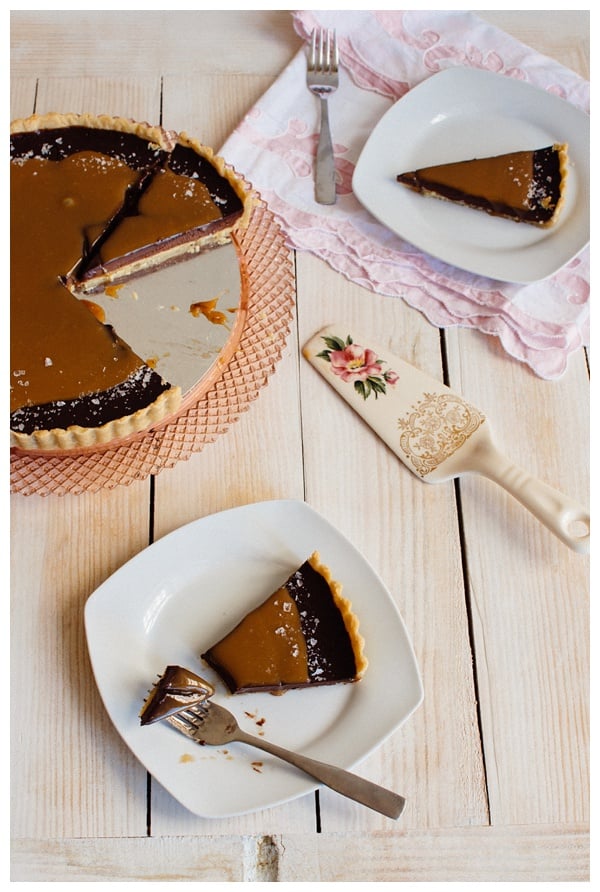
French Salted Caramel Chocolate Tart Recipe
Jordan Hamons | The Hungry Traveler
Yields 10
Ingredients
228 grams (2 sticks) firm unsalted butter
1/2 teaspoon kosher salt
2 tablespoons confectioners’ sugar
75 grams (3/4 cup) almond flour
1 large egg
1 teaspoon vanilla extract
240 grams (2 cups) all-purpose flour
400 grams (2 cups) granulated sugar
1 cup water
1 cup heavy cream, warmed slightly in microwave or on stovetop
170 grams (12 tablespoons) room temperature unsalted butter, cut into small cubes
2 teaspoons vanilla extract
1 teaspoon kosher salt (plus more to taste)
1 cup heavy cream
1/4 cup whole milk
226 grams (8 ounces) semisweet chocolate, chopped
1/4 teaspoon kosher salt
1 1/4 teaspoons instant espresso powder
1 large egg
1 cup salted caramel sauce
Flaky sea salt (such as Maldon) for sprinkling
Whipped Cream or Vanilla Ice Cream
Instructions
Lightly spray a fluted 10 inch tart pan with a removable bottom with cooking spray.
In a stand mixer fitted with the paddle attachment, on medium speed, beat the butter until creamy. The butter will still be very cold but the texture will be creamy and just slightly fluffy.
Add the salt, sugar, almond flour, egg and vanilla and mix on medium speed until well combined. Scrape down the paddle and the sides and bottom of the bowl.
Add about 1/3 of the all-purpose flour and mix on low speed until just combined. Scrape down the paddle and bowl. Add the rest of the all-purpose flour and beat on low speed until just combined. It may take a minute or two but it will eventually come together into a crumbly mixture. Scrape down the paddle and the bottom and sides of the bowl and check for any dry pockets of flour. If there are large dry areas, mix for another 30 seconds or so.
Turn the mixture onto your work surface and gently gather it into a small mound. You don't have to rush, but work quickly to prevent the butter from getting too warm. Using the heel of your hand, push a section of the dough away from you and smear it across the surface of the counter (this is a technique called fraisage and it helps to blend the butter into the dough). Use your hand and continue smearing sections of the dough outward until what was once a mound of dough is now completely flat and smeared across the table. You want it to lose the crumbly appearance and look more like supple dough. The edges should no longer be crumbly, but if they are, repeat the smearing process again.
Use a bench scraper to gather the dough back into a mound. Grab a large chunk of dough and press it evenly into the bottom and up the sides of the tart pan. Continue adding small pieces of dough and patching and pressing the crust together until the entire bottom and sides of the tart pan are covered as evenly as possible. I like to be generous in the amount of dough I press up the sides because I find it help support the tart. The dough on the sides should reach just over the top of the pan. If there are any thin spots, use pieces of the remaining dough to patch them. You may have some dough left over.
Run a rolling pin directly over the top of the tart shell to cut the dough and create an even edge. Remove the loose dough pieces and discard. Use a fork to gently poke holes all over the bottom and up the sides of the crust.
Place the tart pan on a baking sheet. This helps to prevent accidentally knocking the bottom when taking it in and out of the oven.
Line the tart shell with parchment paper and fill it to the top with pie weights or dried beans. Refrigerate for 30 minutes. (You can even make the caramel during this time, if you want). While the crust is chilling, preheat the oven to 325 degrees and position a rack in the center.
Bake the tart shell for 25 minutes. Remove the parchment paper and pie weights and bake for 5 more minutes or until the crust is dry and light golden brown in color. This process is called blind baking and simply lets the crust bake for a bit before adding the filling. Since we won’t bake the chocolate filling for long, we bake the crust on its own to ensure its thoroughly baked.
Place the baking sheet with the tart pan on a wire rack and let cool completely while you make the caramel and the filling. Reduce the oven temperature to 275 degrees.
Carefully pour the sugar into a medium heavy bottom saucepan, taking care not to get sugar on the sides of the pan. Lightly sprinkle the water over top of the sugar, making sure not to splash sugar on the sides of the pan. If there are sugar crystals on the side of the pan, use a clean pastry brush dipped in water to brush them away.
Bring the mixture to a boil over medium-high heat and let the sugar dissolve and cook without stirring. I know it’s hard, but avoid the temptation to stir and let the boiling do the work. If the sugar is cooking unevenly, lift the pan off the heat and gently tilt the pan and swirl the sugar to blend. Continue to cook the sugar until it begins to darken and reaches a straw color. Reduce the heat to medium and let the caramel cook a few more minutes until it reaches a deep amber color or just begins to release wisps of white smoke. Be sure to watch carefully because it can burn very quickly. If you’re having trouble discerning the color of the sugar, dip a spatula into the mixture and drip some of the sugar onto a white plate. You’ll be able to see the exact color.
Remove the sugar from the heat and slowly stream in the warm cream. The mixture will bubble and sputter so stand back and be careful. Once the cream is incorporated, carefully whisk in the butter, vanilla extract, and salt. The sauce should be smooth but if there are some lumps or hard bits, put the pan back on low heat and stir the caramel until it is smooth.
Pour the caramel into a heat safe container and let cool before tasting. Once the caramel is cool enough to handle, taste it and add more salt if desired.
Place the chocolate and salt in a medium heatproof bowl.
In a microwave-safe measuring cup, microwave the cream, milk, and espresso until they reach a boil, about 1 minute.
Pour the boiling cream over the chocolate and let sit for 5 minutes. Whisk until well blended and smooth. Whisk in the egg.
Carefully pour the chocolate filling into the pre-baked tart shell and bake until set and slightly puffed, about 25 minutes. It will still be slightly jiggly in the center but will firm up as it cools. Let the tart cool to room temperature before slicing.
Serve the tart at room temperature. Garnish each piece with a generous drizzle of salted caramel, a pinch of sea salt, and a scoop of whipped cream or vanilla ice cream.
Notes
Be cautious when working with the tart pan. The bottom is removable and it is easy to accidentally grab the pan from the bottom and have your tart fall out onto the floor. I recommend placing the tart pan on a baking sheet and using that to move it in and out of the refrigerator and oven.
Storage
The prepared tart can be lightly wrapped and kept in the refrigerator for 2-3 days.
Make Ahead
The crust can be made 2-3 days ahead and covered with plastic until ready to use.
To receive recipes and travel stories in your inbox, subscribe to my mailing list here.
This recipe for the French Salted Caramel Chocolate Tart is part of Food Network’s Comfort Food Fest. Check out these great Valentine’s Day recipes from my fellow contributors:
Feed Me Phoebe: Dark Chocolate Vegan Truffles with Matcha Green Tea
Creative Culinary: Chocolate Pecan Tart from Chef François Payard
The Hungry Traveler: French Salted Caramel Chocolate Tart
Dishing with Divya: Rock Truffles
Elephants and the Coconut Trees: Easy Chocolate Fudge – 2 Minute Microwave Recipe
In Jennie’s Kitchen: Devil Dog Cupcakes
Napa Farmhouse 1885: Homemade Chocolate Sauce
Red or Green: Chocolate Spice Bark With Sea Salt
The Mom 100: Chocolate Banana Cake
Taste with the Eyes: Chocolate Pots de Creme with Passion Fruit
Healthy Eats: 5 Chocolatey Reasons to Stay in This Valentine’s Day
Swing Eats: Nutella Panna Cotta
FN Dish: 5 Chocolatey Treats Better Than a Box of Store-Bought Truffles

 Save Recipe
Comments