The thing I love most about cooking is that there’s always something new to learn. It keeps things interesting, but can also be one of the biggest challenges.
In culinary school, one chef would teach us how to break down a chicken and the next chef would tell us that method was completely wrong. This happened constantly. We would learn a technique from one chef, and another instructor would completely disagree with what we had learned and teach us something different.
This was difficult for me. I had come from business school where questions had one correct answer. I was used to memorizing vocabulary, learning theories, and understanding concepts. I was not comfortable with questions that had multiple correct answers and had a hard time figuring out what information to believe.
To be successful in the culinary world, you have to do things exactly the way your chef (and your chef is whoever is in charge at that moment) wants them done. It doesn’t matter what your last chef taught you or what method you think is correct. You ask your chef how he/she wants something done and you follow his/her instructions.
I learned to ask questions. Instead of just following blindly, I asked my chefs why they did things the way they did them. I did what they wanted but I always asked, “Chef, why do you do it like this?” This gave me the opportunity to consider their reasoning and decide what techniques I liked best. I often learned tips and tricks but sometimes the answer was just, “That’s how my chef wanted it done so that’s how I do it too.”
Beyond teaching me the fundamentals of cooking, culinary school taught me a new way of learning and questioning.
What I learned in culinary school has continued to help me as I pursue blogging and food writing. The hardest part of blogging, for me, is photography. Similar to what I experienced in culinary school, every photographer has his/her own ‘right’ way of doing things. The more I read about food photography, the more confused I get. But culinary school taught me how to be comfortable with multiple right answers and I’ve learned to consider multiple sources and figure out the methods that work best for me. It’s been a process of trial, error, and lots of practice.
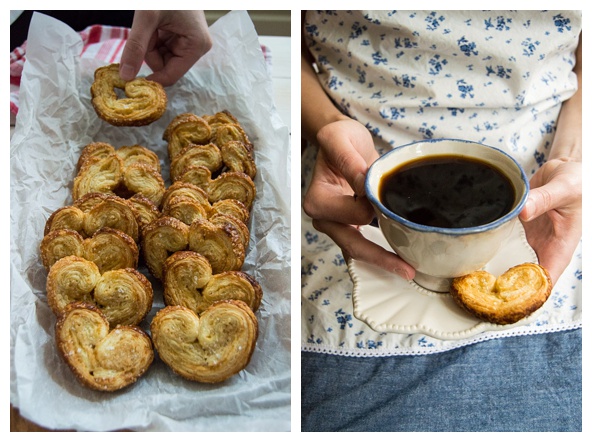
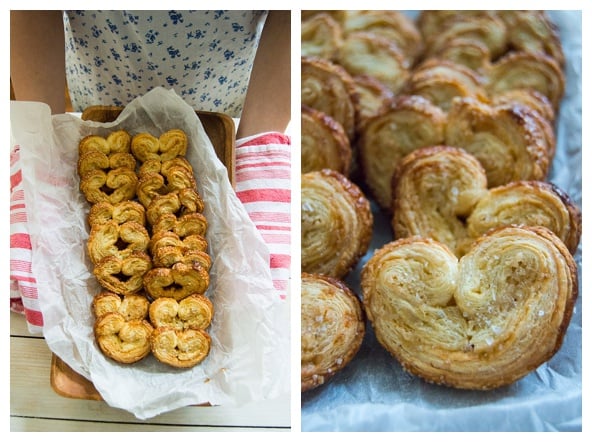
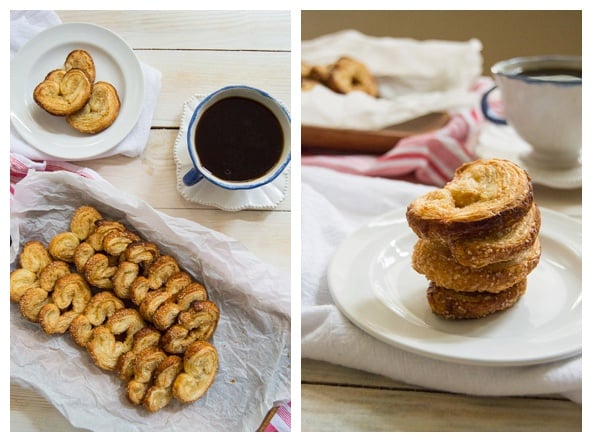
The photos in today’s post were taken as an assignment for an online food photography course I took late last year. The course was about using your photos to tell a story, rather than just posting beauty shots of the food. The story I am telling is about how to make palmiers, or French elephant ear cookies, that are crispy, buttery, flaky and look way more complicated than they are.
My goal with the photos was to illustrate how to roll, shape and bake the cookies. Ideally you could figure out how to make them just by looking at the photos, but I’ve still included instructions and a recipe.
Thank you to my wonderful, patient friend Annie for devoting an afternoon to being my hand model for these shots.
How to Make French Palmiers
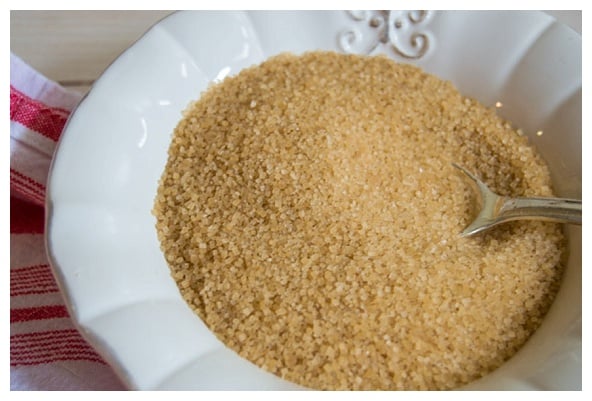
Palmiers can be made with granulated white sugar or a crunchy, coarse sugar like demerara, as shown in the photos. I like to whisk some sea salt into the sugar to balance the sweetness.
Start by sprinkling some sugar on your work surface and on top of the puff pastry.
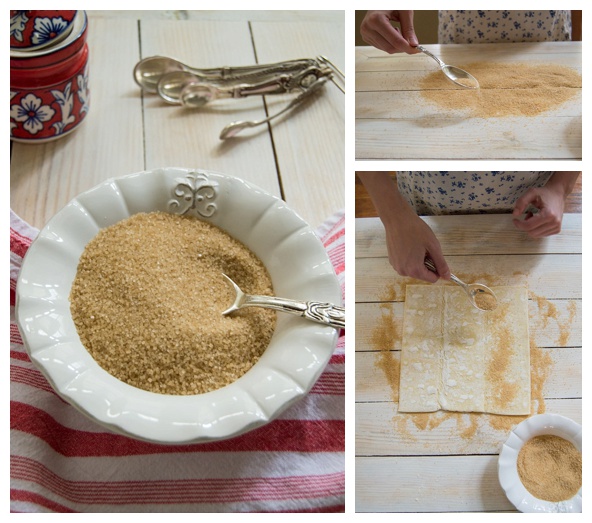
Use a rolling pin to lightly roll the dough into a 13-inch square and press the sugar into the pastry.
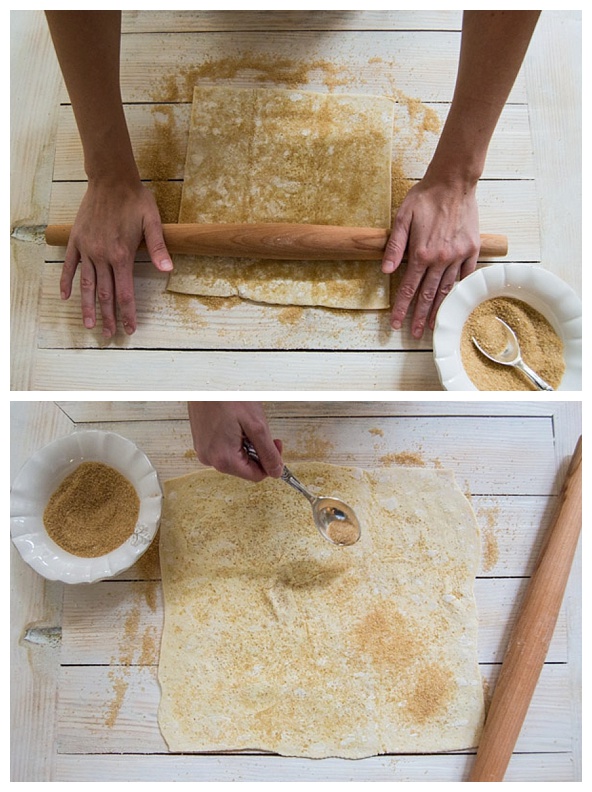
Fold the edges of the dough until they meet in the center, add more sugar, and fold the edges in again. Add more sugar and lightly roll with the rolling pin to adhere.
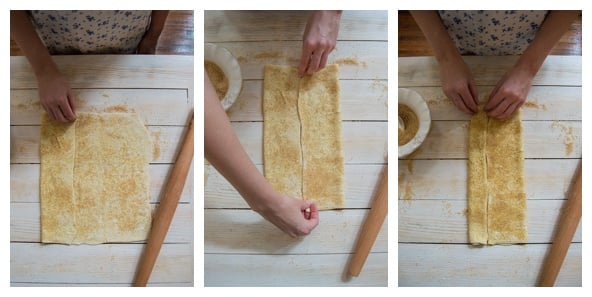
For the final fold, bring the two edges together like you’re closing a book.
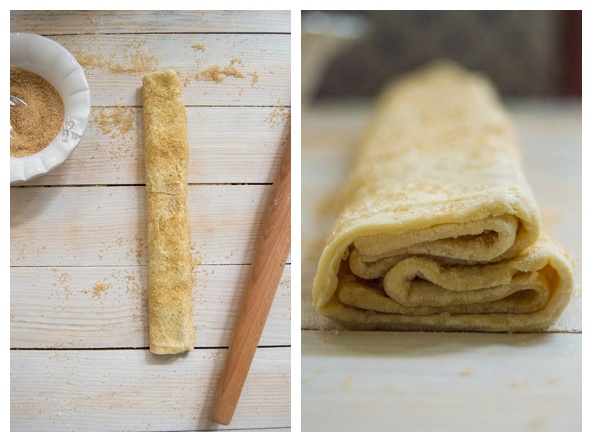
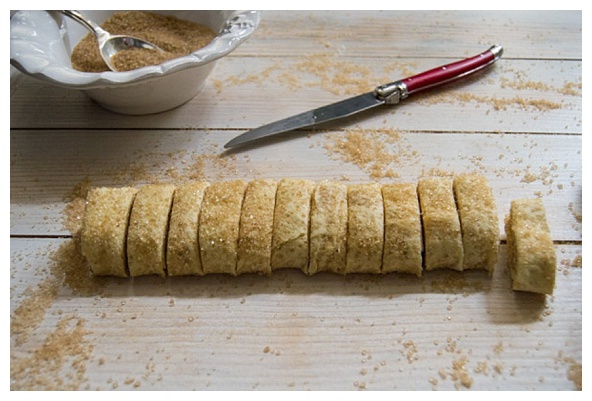
After chilling the dough for 30 minutes, use a sharp knife to cut the dough into 1/2-inch slices and place them cut side up on a baking sheet lined with parchment paper.
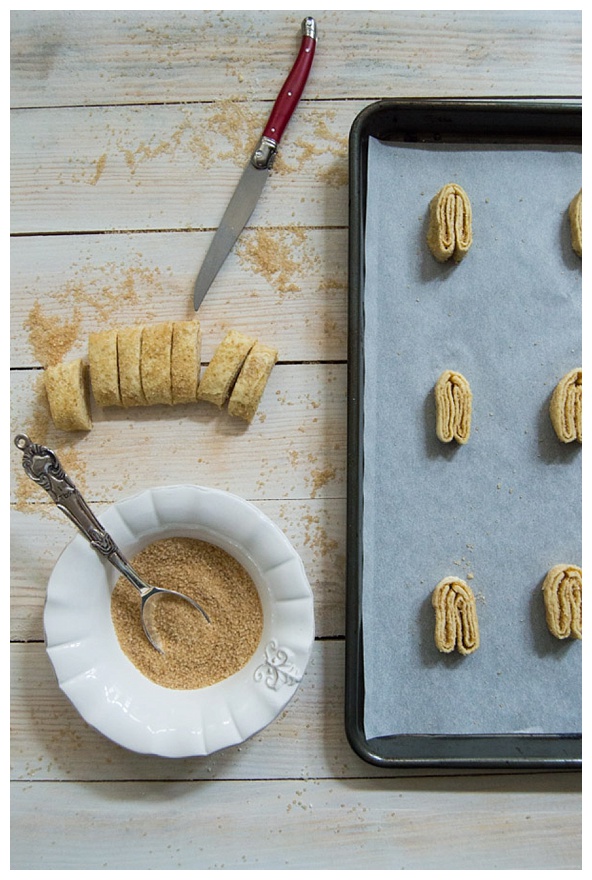
Bake the palmiers until they are a deep golden brown color.
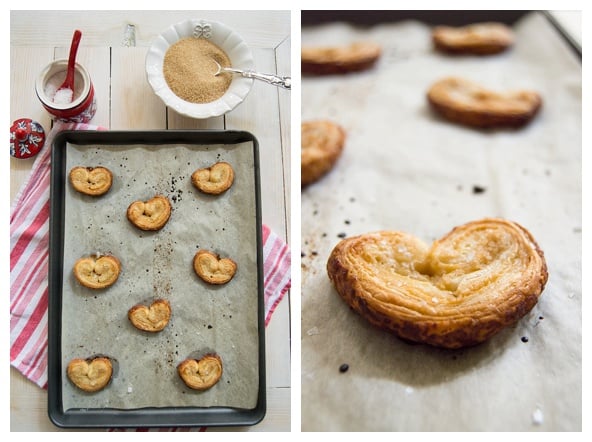
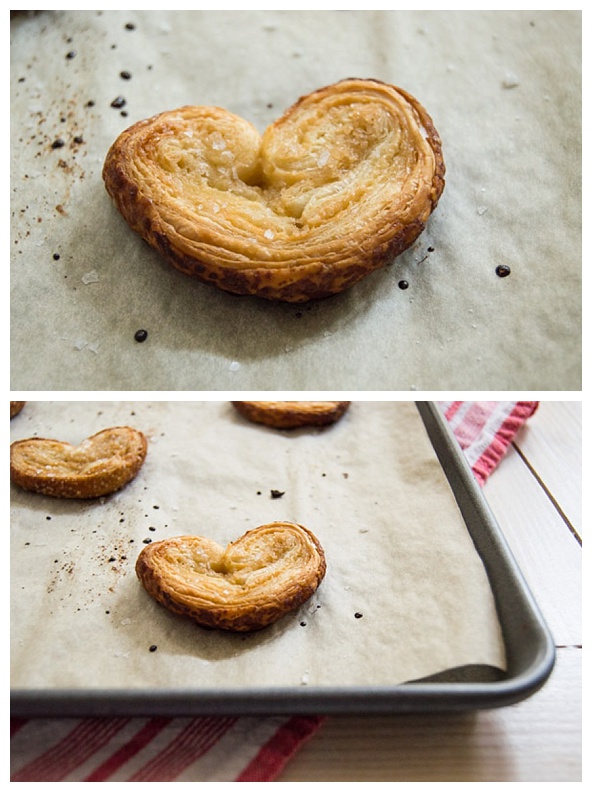
As soon as the palmiers come out of the oven, sprinkle each cookie with a generous pinch of flaky sea salt.
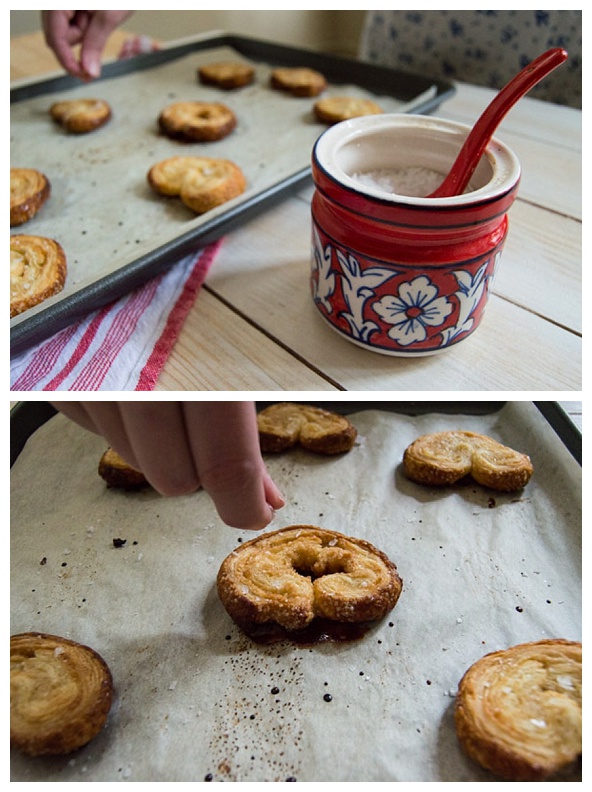
The cookies are best when warm and fresh out of the oven. Palmiers pair perfectly with a hot cup of coffee or tea.
Yields 26 cookies
Ingredients
8 ounces frozen all-butter frozen puff pastry, thawed (one sheet of pastry from most brands)
1 1/2 cups (300 grams) granulated sugar (This is an approximate guideline)
1/4 teaspoon kosher salt
Instructions
Whisk together the sugar and salt.
Spread about 1/2 cup of the sugar on your work surface and place the unfolded sheet of puff pastry on top. Evenly spread another 1/4 cup of sugar on top of the puff pastry.
Using a rolling pin, start rolling the dough into a 13 inch square. If the dough starts to stick, add more sugar to keep it moveable. You should be using the rolling pin to press the sugar into the dough and make it adhere.
Once the dough is the desired size, sprinkle it with another 1/4 cup of the sugar and gently roll the rolling pin on top to lightly press the sugar into the dough.
Make a small indent at the 6.5-inch or midpoint mark with your finger or the back of a paring knife. Now fold the left and right vertical sides of the dough into the center so they meet at the mark in the middle. Sprinkle another 1/4 cup of the sugar on top and light roll with the rolling pin to adhere. Now repeat the same folding process and fold the two vertical sides inwards so they meet in the center. Sprinkle with 1/4 cup sugar and lightly roll with the rolling pin to adhere. Finally, fold the left side over on the right side, as if closing a book. Place the dough into the freezer to chill for 30 minutes.
Preheat the oven to 425 degrees and line two baking sheets with parchment paper.
Remove the chilled dough from the refrigerator and cut the dough crosswise into 1/2 inch slices. Place each piece on the baking sheet cut side up and sprinkle the top of each cookie with a pinch of sugar. Leave at least 2 inches of space between each cookie.
Bake the cookies for about 8-10 minutes and then use a spatula to flip each cookie over. Rotate the pans. Turn the oven down to 325 and continue baking for 5-10 more minutes or until the cookies are a deep golden amber color. Let cool completely on the pan.
Notes
Notes Let the puff pastry dough thaw in the refrigerator overnight. It should be pliable but very cold. If you do not have enough baking sheets, bake the cookies in two batches. You will not get all of the sugar incorporated into the puff pastry. You can keep the leftover sugar to use for your next batch of palmiers.
Storage Store the palmiers in an airtight box for up to 2-3 days. You can freeze them but you will need to re-crisp them in a 325 degree oven for 5-10 minutes before serving.
Variations Cinnamon sugar palmiers Pinch of flaky sea salt on the top Dip the tops in chocolate Sandwich together with buttercream
If you liked this recipe, you may also enjoy:
French Salted Caramel and Chocolate Tart
To receive recipes and travel stories in your inbox, subscribe to my mailing list here.


 Save Recipe
Comments